Webhooks
In this guide, we will explain how to use Webhooks to integrate the 4HSE platform with external web services, automating processes and synchronizing data in real time.
What are Webhooks?
Section titled “What are Webhooks?”A webhook is a trigger that automatically sends data to a specified URL when a particular event occurs. Unlike traditional API calls, where an external system needs to “poll” 4HSE to check for changes, webhooks work the other way around: 4HSE “calls” a web service to notify it of a change, such as the creation of a new user or the update of a certificate. This event-driven approach is much more efficient and responsive.
Available Events
Section titled “Available Events”Currently, 4HSE supports the following events for triggering webhooks. These events cover create, update, and delete (CRUD) operations on the platform’s main resources:
PERSON::CREATEPERSON::UPDATEPERSON::DELETEACTION_SUBSCRIPTION::CREATEACTION_SUBSCRIPTION::DELETECERTIFICATE::CREATECERTIFICATE::UPDATECERTIFICATE::DELETECERTIFICATE_ACTION::CREATECERTIFICATE_ACTION::UPDATECERTIFICATE_ACTION::DELETE
When one of these events occurs, 4HSE sends an HTTP POST request to the configured Endpoint, including the event data in the request body.
How to Configure a Webhook
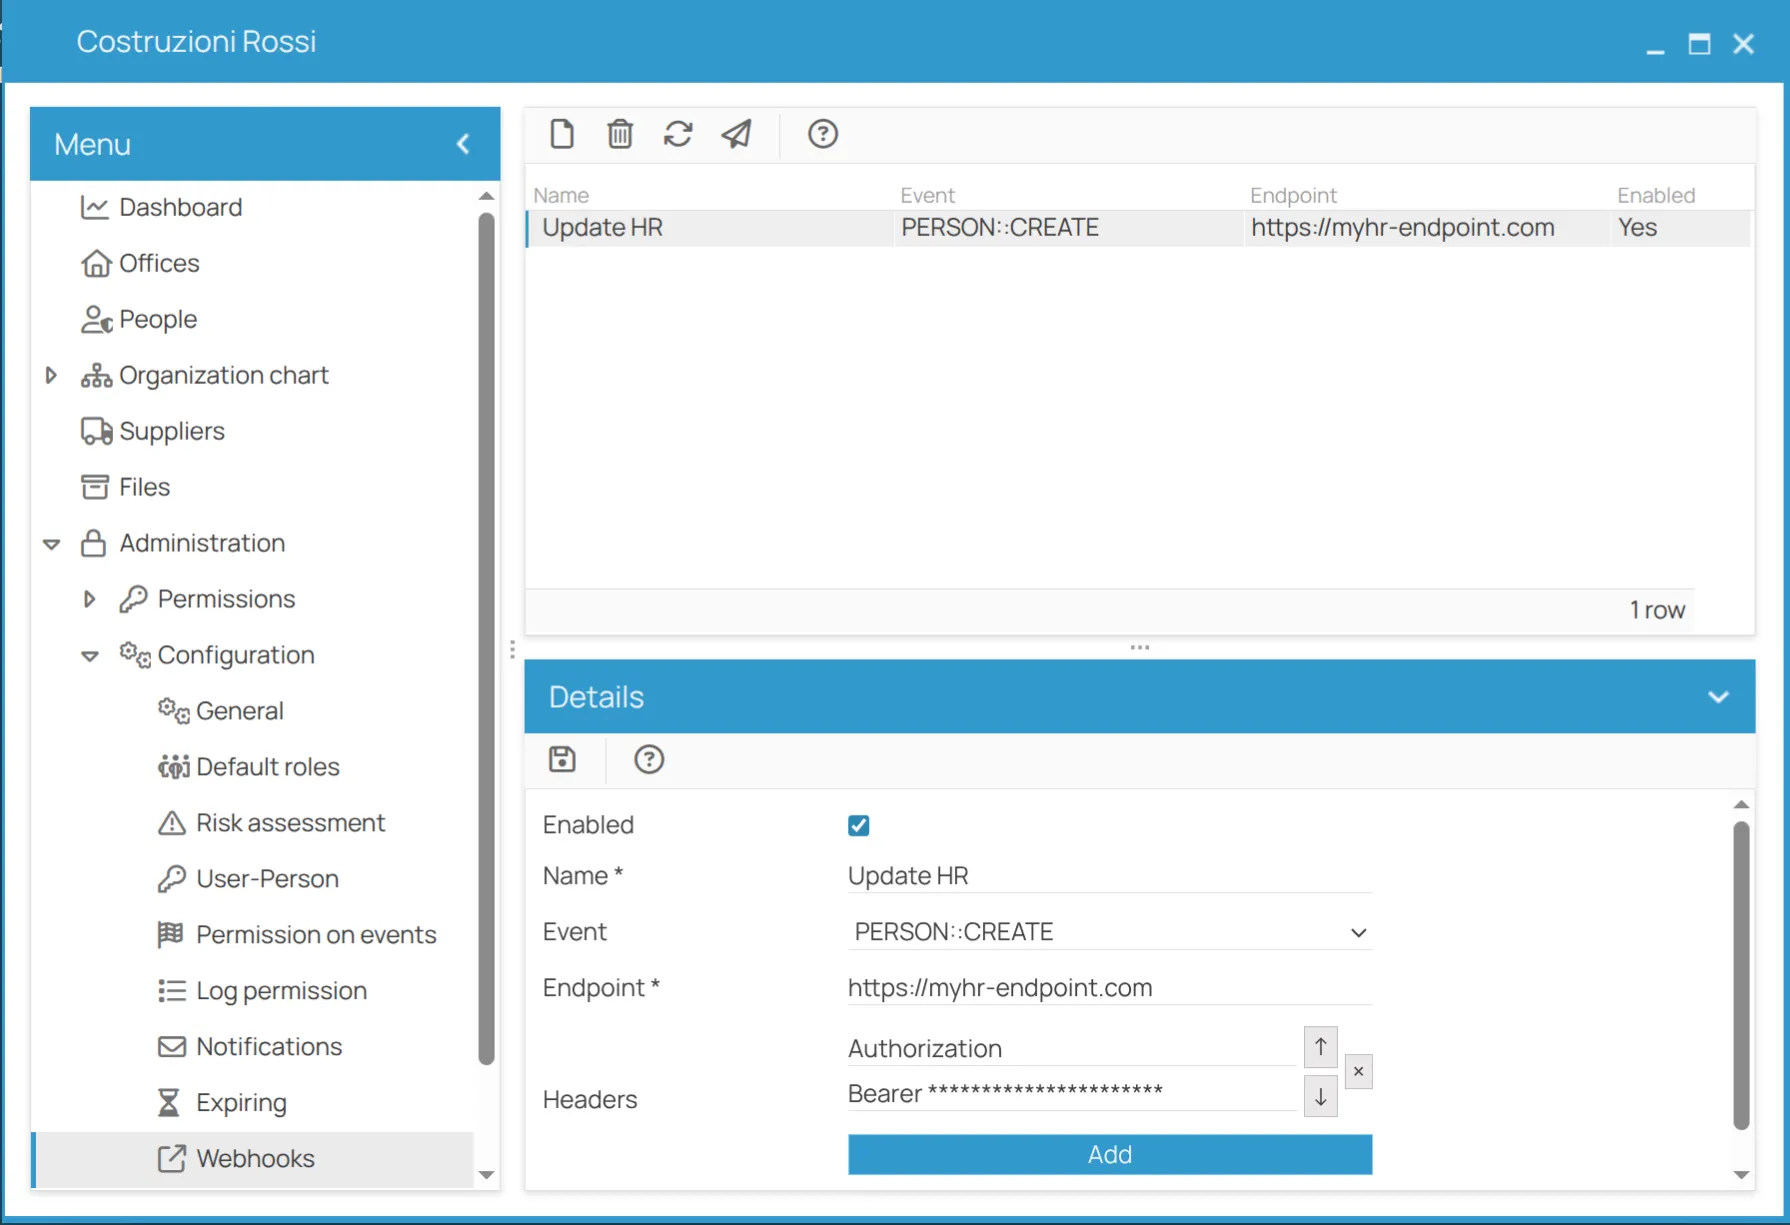
Section titled “How to Configure a Webhook”To register a new webhook, navigate to the 4HSE administration panel: Menu > Administration > Configuration > Webhooks.
From the top grid, you can view the list of existing webhooks and add a new webhook by clicking the
The fields to define a webhook are as follows:
- Enabled: This checkbox can be selected to activate the webhook. You can deselect it at any time to temporarily deactivate the webhook without deleting it.
- Name: A descriptive name to easily identify the webhook (e.g., “New User Synchronization”).
- Event: The event can be selected from a list of available events.
- Endpoint: The URL of the web service that will receive the data. The endpoint must be public and capable of receiving HTTP POST requests.
- Headers: A field to add custom HTTP headers. This feature is particularly useful for passing authentication tokens (
Authorization) or other security keys required by the web service.
Once the fields are filled out, you can click

Testing a Webhook
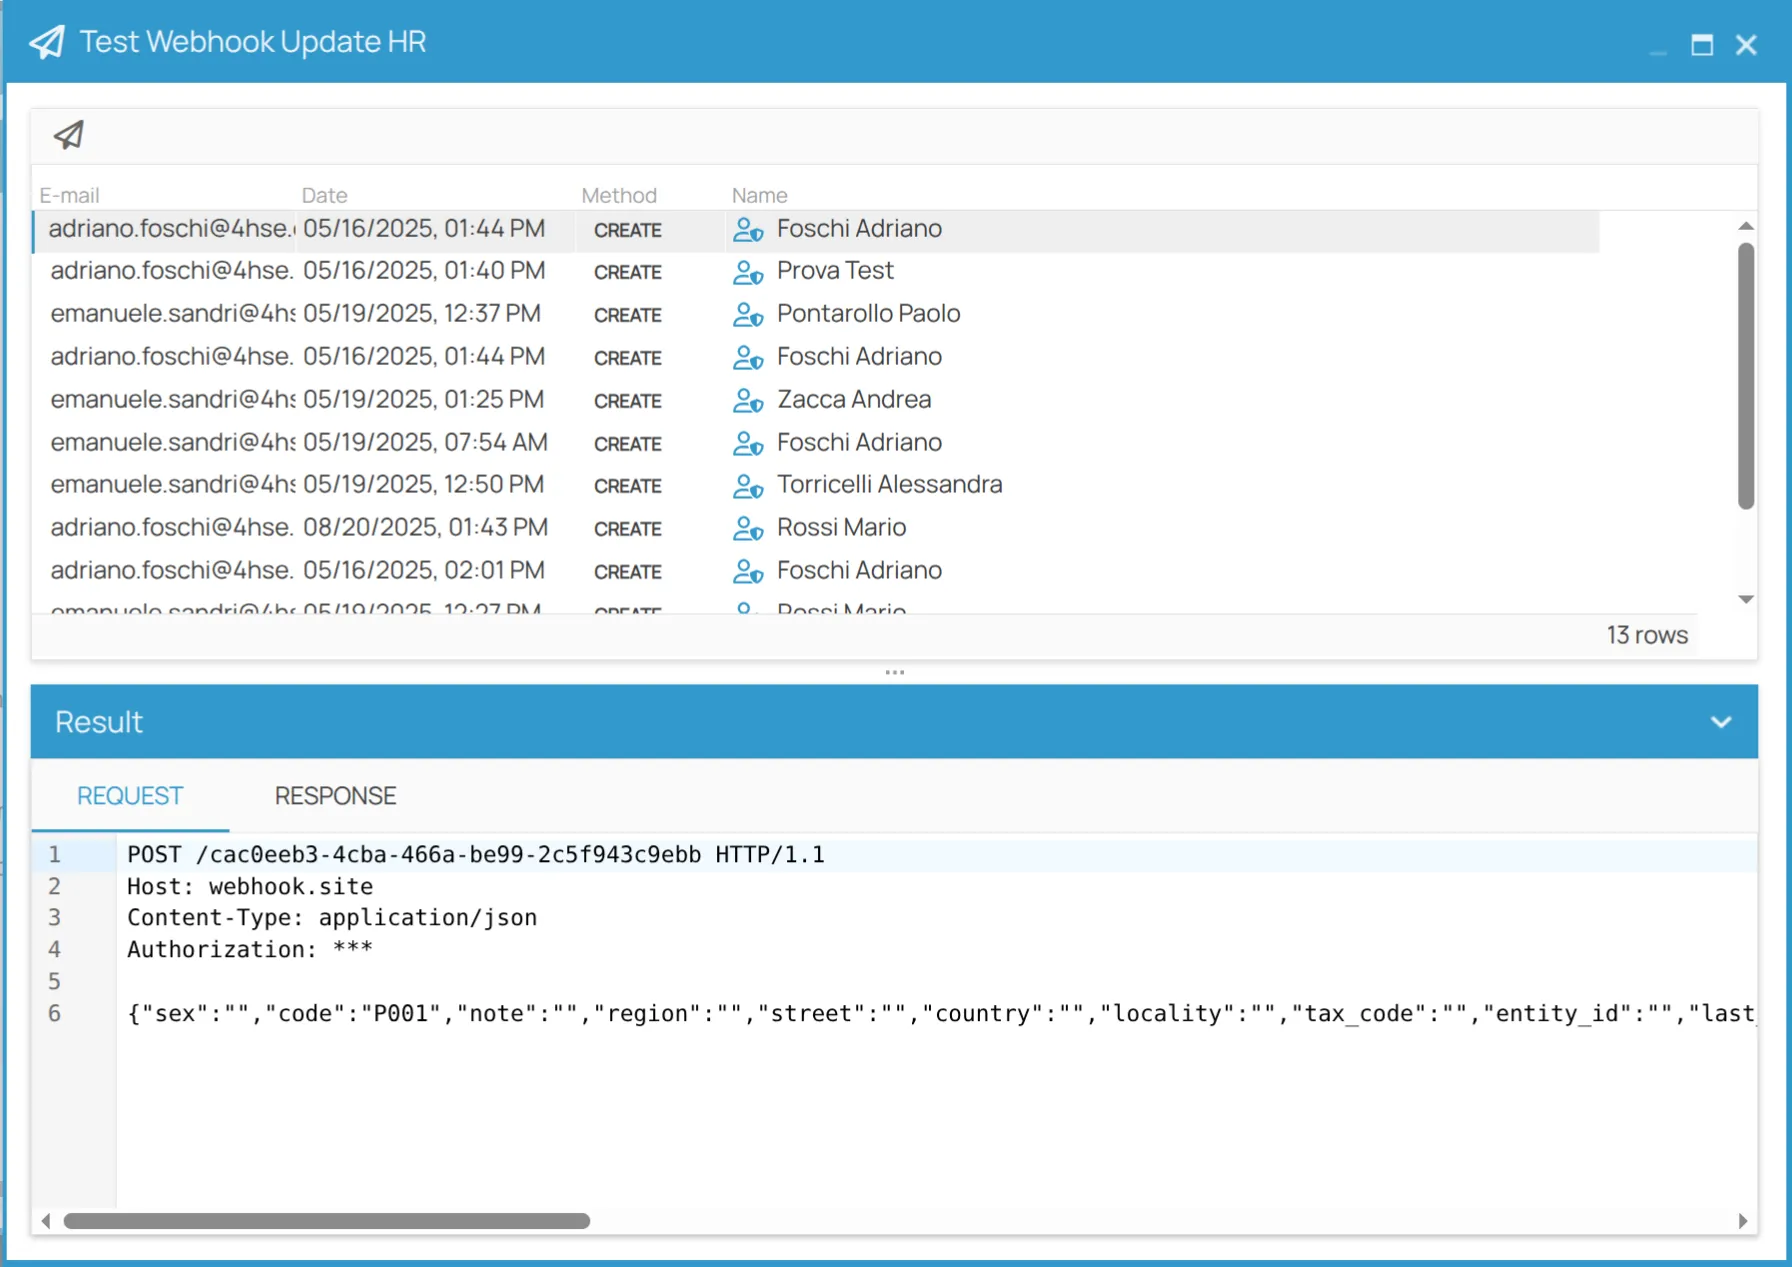
Section titled “Testing a Webhook”On the same Webhooks configuration page, you can test a webhook with an event already generated by the system. When you click the test button, a window opens listing all past events of that type (e.g., all created persons). One of these events can be selected to be manually sent to the webhook.
In the Result section, two tabs are available:
- Request: Displays the payload (the HTTP request body) that 4HSE sent to the endpoint, allowing you to verify that the data is correctly formatted.
- Response: Displays the response received from the web service, including the HTTP status and response body. These details are essential for diagnosing communication errors.

Monitoring Execution
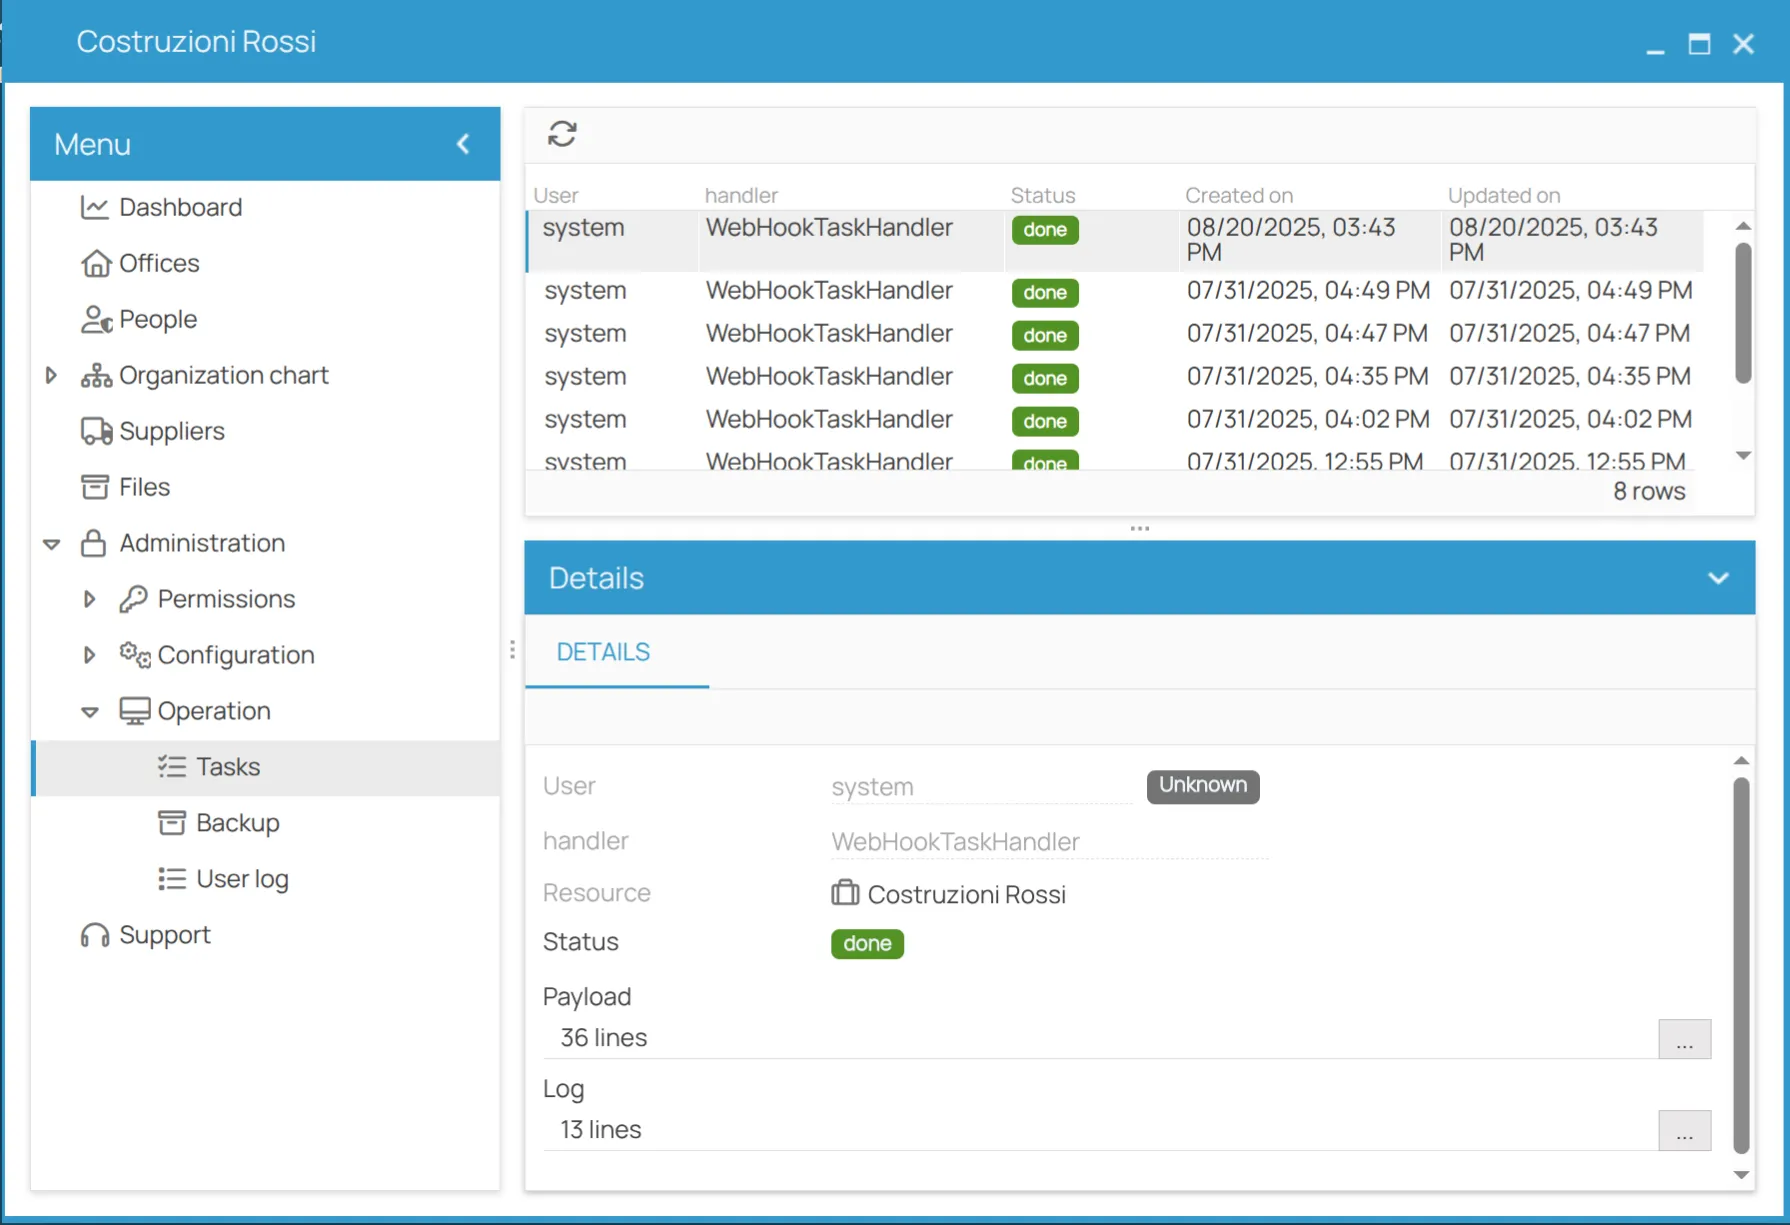
Section titled “Monitoring Execution”For a complete view of all webhook executions in real time, navigate to: Menu > Administration > Operations > Tasks.
In this section, you will find a log of all executed webhooks. Each log entry shows the Status of the delivery (e.g., done for success or failed for failure) and other useful information such as the creation and update dates. By clicking on a single log entry, the Details section opens, allowing you to analyze the Payload and Log to diagnose any issues. This is the primary tool for monitoring webhook functionality in a production environment.
