Related User
What is a Related User
Section titled “What is a Related User”The Related User is a key concept in 4HSE that allows you to link a User to a specific Person. This association connects the data of a real individual registered in the system (the Person) with the account that authenticates and interacts with the software (the User).
To establish the link, you enter the user’s email address in the “Related User” field of the Person’s form. The email acts as the key for this association.
Example: If the person named Sara Martini is registered in the system, you can associate the email of the user who represents her. The association allows the user to access and view their safety-related information with specific permissions.
Permissions for the Related User
Section titled “Permissions for the Related User”Assigning permissions is essential to define what the related user can do. There are different levels of permissions that can be configured:
- None: The related user has no access to the person they are linked to.
- Manager/Read-Write: The user has both read and write permissions and can edit the person’s information.
- User/Read: The user can view the person’s information but cannot make changes. This is a read-only permission.
- Project Default: The user inherits the permissions defined at the project level. (In the next section, we explain how to set the default permission).
How to assign the Related User and its permissions
Section titled “How to assign the Related User and its permissions”The association and permission management can be carried out in different ways.
1. From the Person’s page
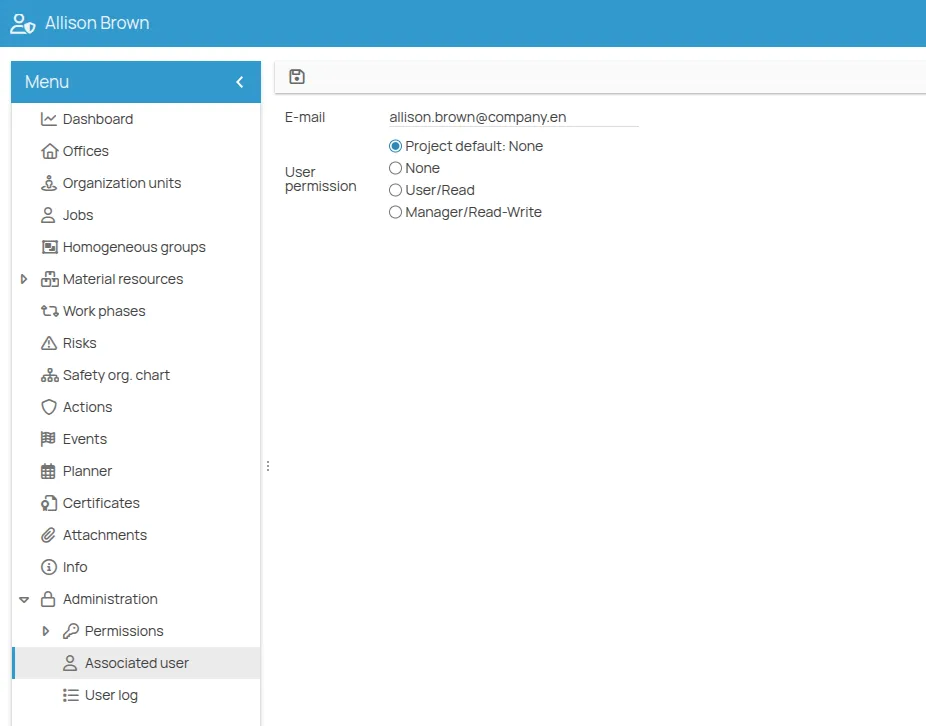
Section titled “1. From the Person’s page”You can associate a user with a person and configure their permissions directly from the person’s record. To do this:
- Open the person’s record.
- Go to the Administration menu and select Related User.
- Enter the user’s email address.
- Choose the desired permission level from the available options.
- Save to confirm the association and permissions.
2. From the Project settings
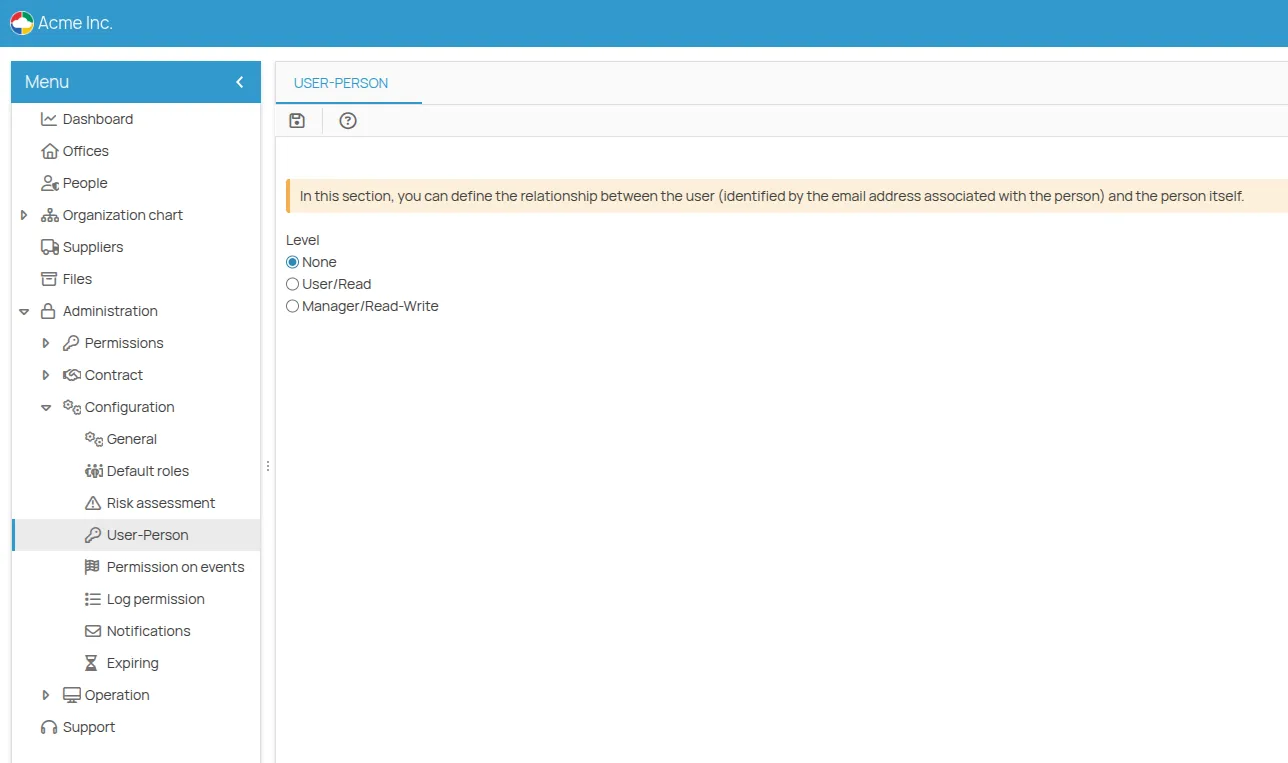
Section titled “2. From the Project settings”The project administrator can set a default permission for all new related users. This feature is useful for bulk imports or for those using the APIs.
- Go to Project Menu -> Administration -> Configuration -> User-Person.
- Use the selector to define the default permission.
3. Using the permission management wizard
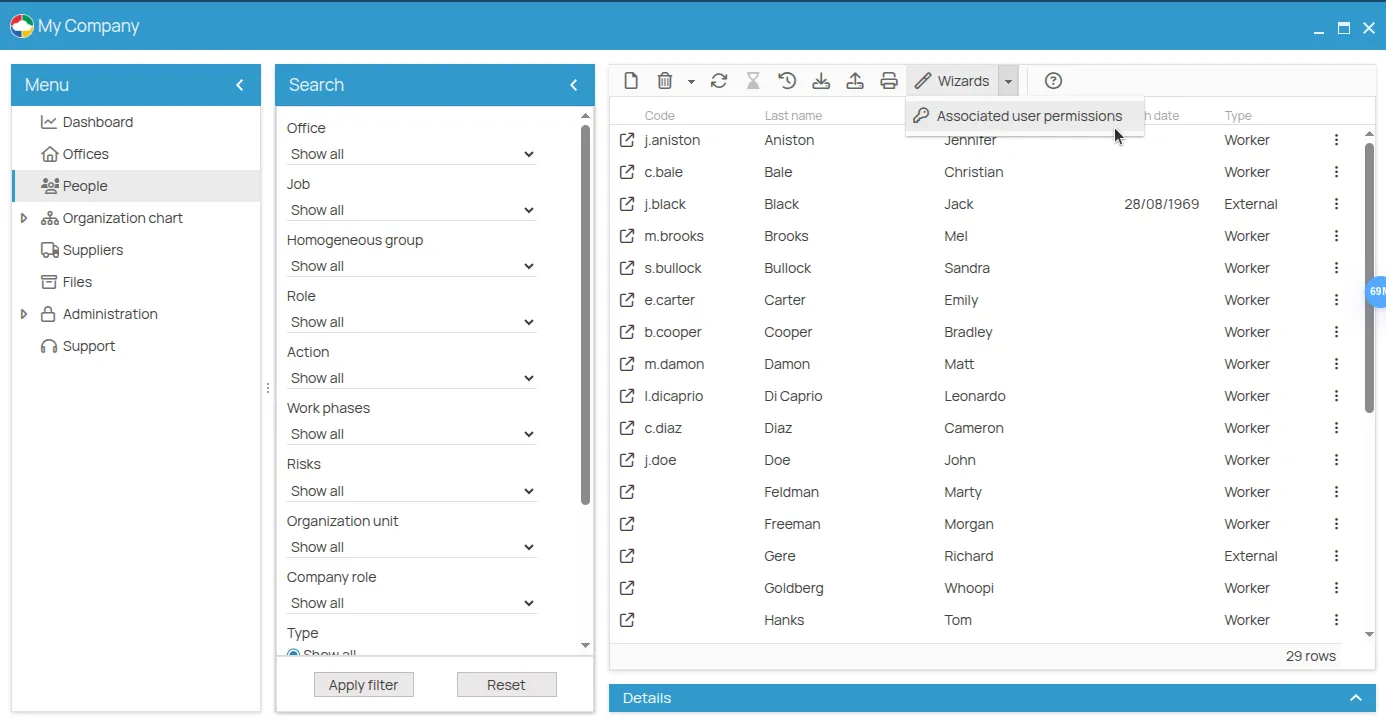
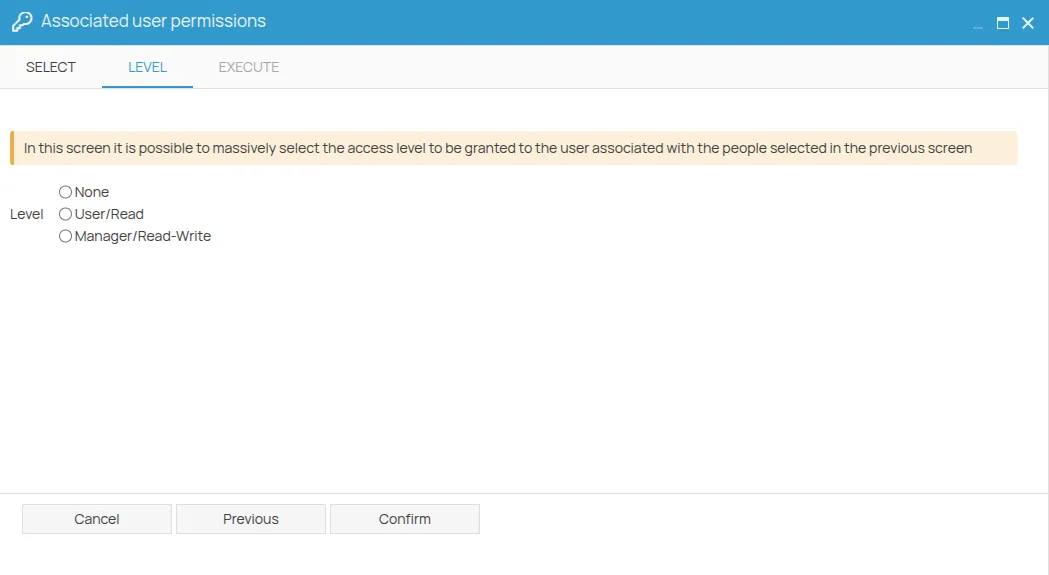
Section titled “3. Using the permission management wizard”To quickly change the permissions of a group of already associated persons, you can use the “Related Users Permissions” wizard.
-
Access the wizard from the people list;
-
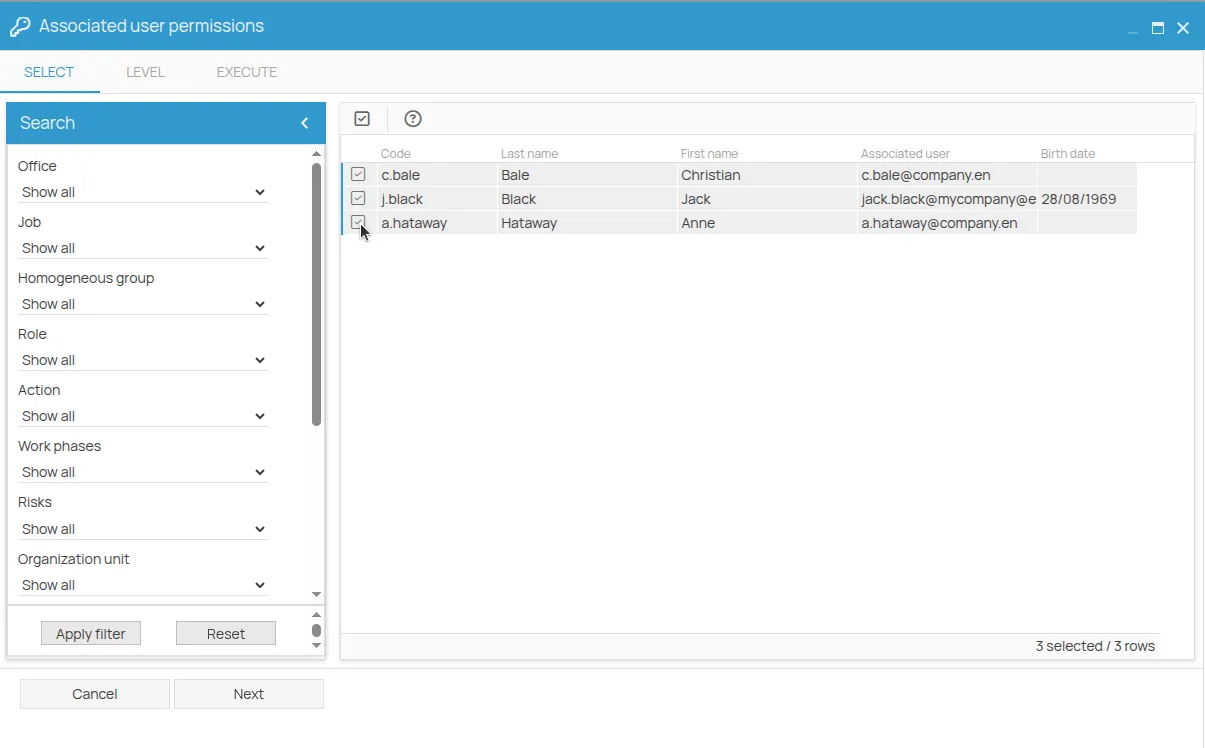
Select the persons whose permissions you want to modify. Only those who already have a related user will be displayed;
-
Choose the permission to assign from the available options;
-
Confirm to apply the permission to all selected persons.
Practical example: a worker with minimal permissions
Section titled “Practical example: a worker with minimal permissions”An administrator needs to give a worker, Mario Rossi, access to the platform so he can view his safety situation without being able to see other data.
Here’s how the administrator configures the permissions:
- Project-level permission: The administrator assigns Mario Rossi the “na” (no access) permission at the project level. This ensures that the user cannot view or manage the company’s general data.
- Person-level permission: The administrator associates the user “mario.rossi@company.com” with the person “Mario Rossi” and sets the permission to “User/Read”.
In this way, Mario Rossi will not have access to the project in general, but he will be able to view in read-only mode the information related to his person and the entities associated with him (courses, PPE, deadlines, etc.), without being able to modify them.