Health Surveillance
The Health Surveillance section is located within the Prevention Actions area of each project office.
From the Actions module, select the Health Surveillance menu, structured into two levels:
- Prescriptions: define the health surveillance requirements for company personnel
- Medical Examinations: set the scheduling for the execution of the prescriptions
Within the Health Surveillance section, you can also:
- Register an existing certificate (e.g., for past medical exams)
- Schedule a medical exam
- Register the outcome of a scheduled exam
- Generate a certificate or upload an external one
Add a New Prescription
Section titled “Add a New Prescription”You can create two types of prescriptions:
- New: create a prescription from scratch
- Copy from: duplicate an existing prescription
Click New, fill in the required fields, and then click Save to confirm.
Alternatively, you can use the bulk import function via the Import button in the toolbar.
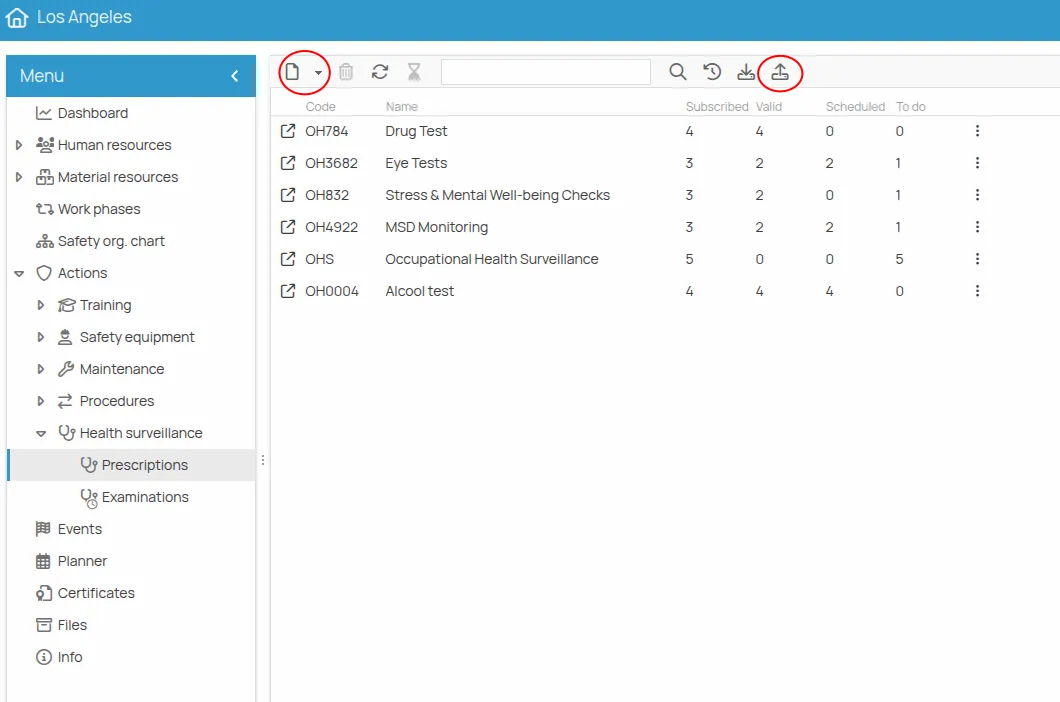
A new row will now appear in the table with all indicators set to zero. (If no change is visible, click Refresh in the toolbar.)
You can also double-click the row or the “link” icon to access the prescription details page, where you can manage all relevant information.
Manage a Prescription
Section titled “Manage a Prescription”You can manage a prescription either through the Details tab or the prescription page.
- The Details tab includes the main prescription fields:
- Name
- Description
- Validity: time interval between certifications
- Expiring: number of days before expiry for status “expiring”
- Responsible, Assigned, and Observer fields
Click the ”+” button to choose from People, Office Users, or Roles defined in the office’s Safety Org Chart. Multiple subjects can be assigned to the same role.
These assignments are automatically inherited by all future editions of the same prescription.
- Recipients: list of people registered for the prescription
- Examinations: list of medical exams associated with the prescription
- Requested by: elements whose risks are mitigated by the exam
- Attachments: associate documents via file link or upload
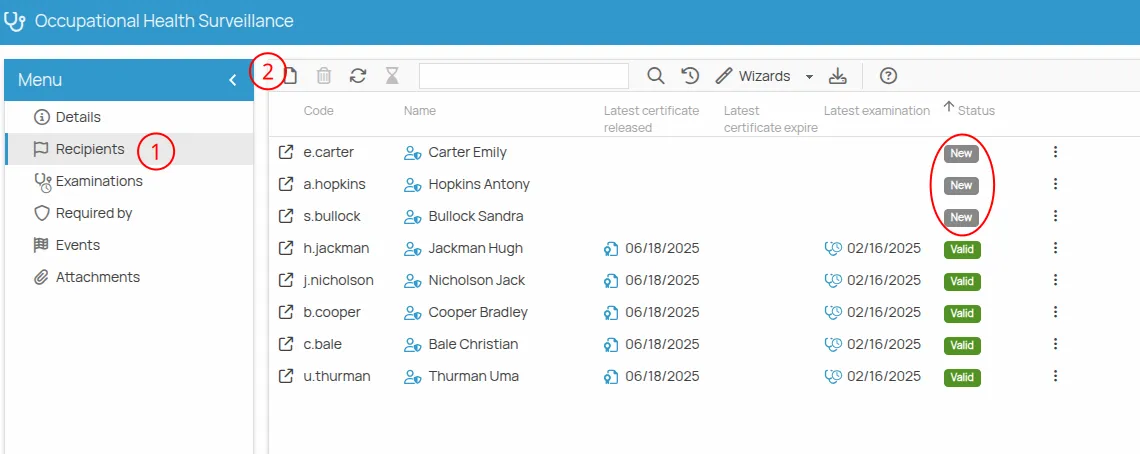
Add Recipients to a Prescription
Section titled “Add Recipients to a Prescription”Recipients are workers who require health surveillance due to risks related to their job, which may be tied to tasks, areas, equipment, or work phases.
- Click Recipients
- Click New
- Select the employees and click Save
Recipients are listed with a Status:
- “New” until managed
- “Valid” or “Expired” according to existing certificates
- “Expiring” if the certificate is near expiry (based on the Expiring setting)
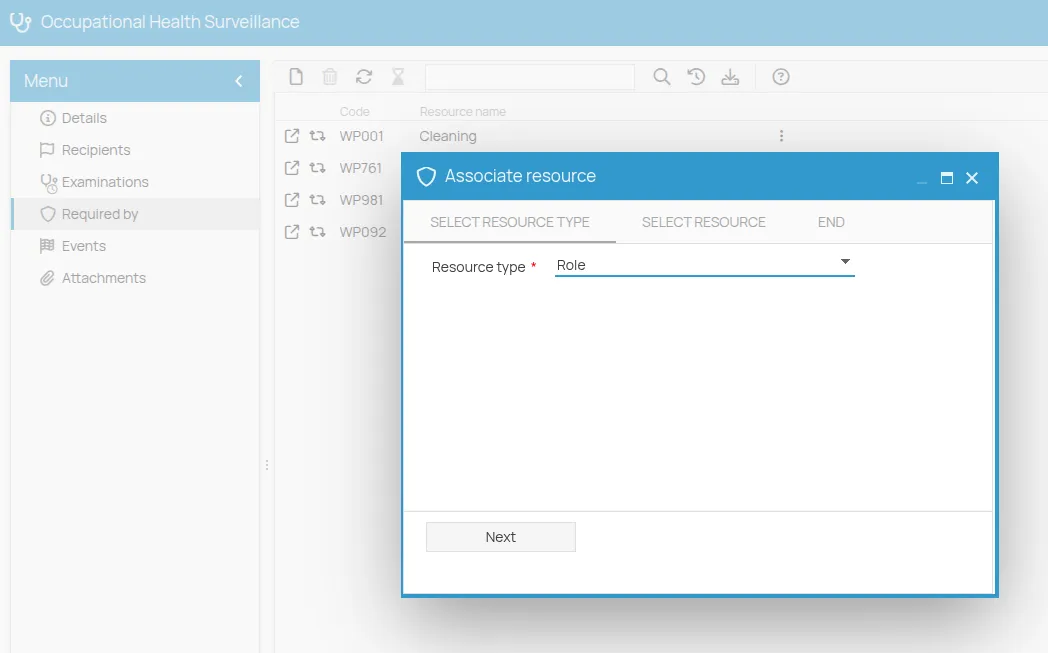
Associate Resources
Section titled “Associate Resources”From the Requested by menu, you can link company resources that require this prescription. This helps trace the prescription’s origin (tasks, roles, environments, etc.).
- Select resources such as:
- Job Task
- Role
- Equipment
- Environment
- Substance
- Work Phase
- PPE
- Click Next
- Select from the listed resources, click Confirm, then Finish
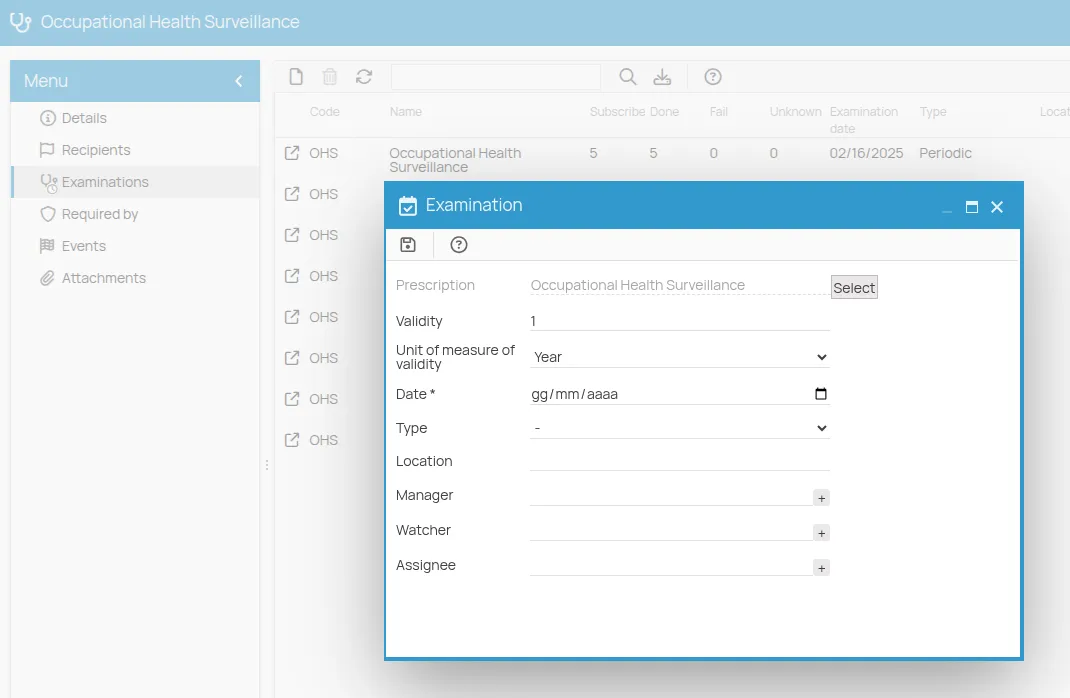
Schedule a Medical Exam
Section titled “Schedule a Medical Exam”After adding recipients, you can schedule a medical exam.
- From Examinations, click New
- Click Select to choose the associated prescription
- Verify the validity of the prescription
- Complete the required fields and assign responsible roles
- Click Save
Enroll People to an Exam
Section titled “Enroll People to an Exam”- Select the exam
- Click Recipients, then New
- Only people already enrolled in the prescription will be shown
- Select individuals and click Save
The exam status will initially be To Complete
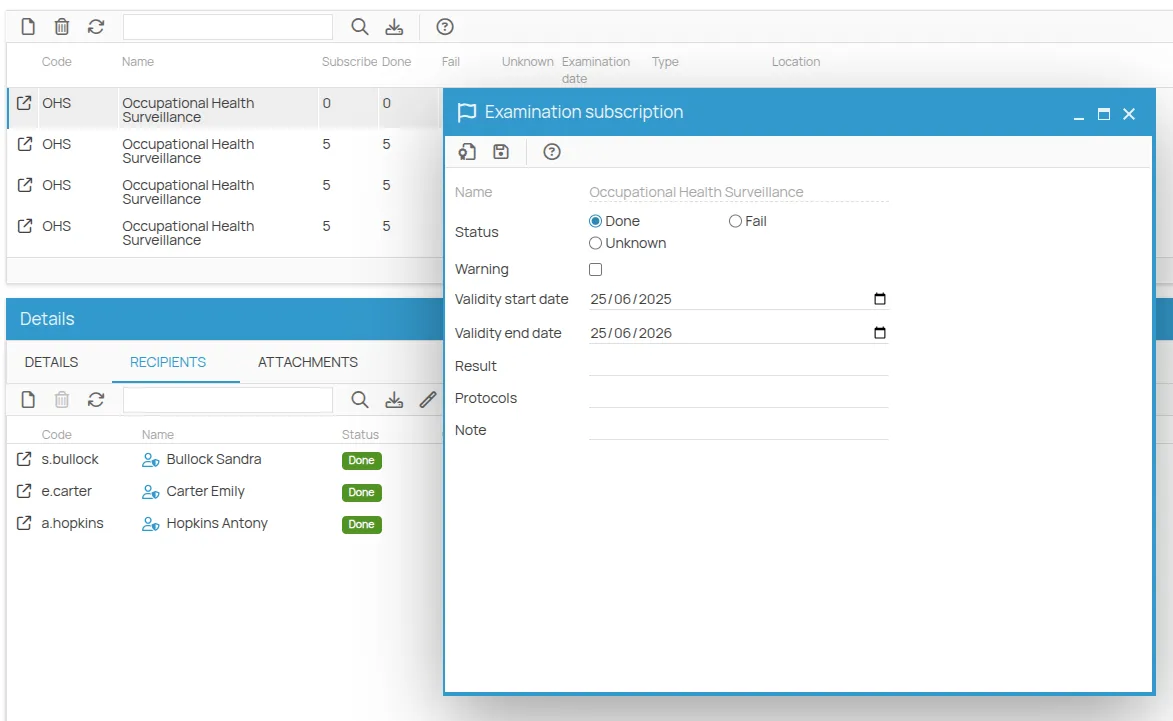
Register Exam Outcome
Section titled “Register Exam Outcome”You can register outcomes individually or in bulk.
Single Entry
Section titled “Single Entry”- Open the detail page of the exam with a double click
- Select the outcome:
PassedorFailed - Click Save
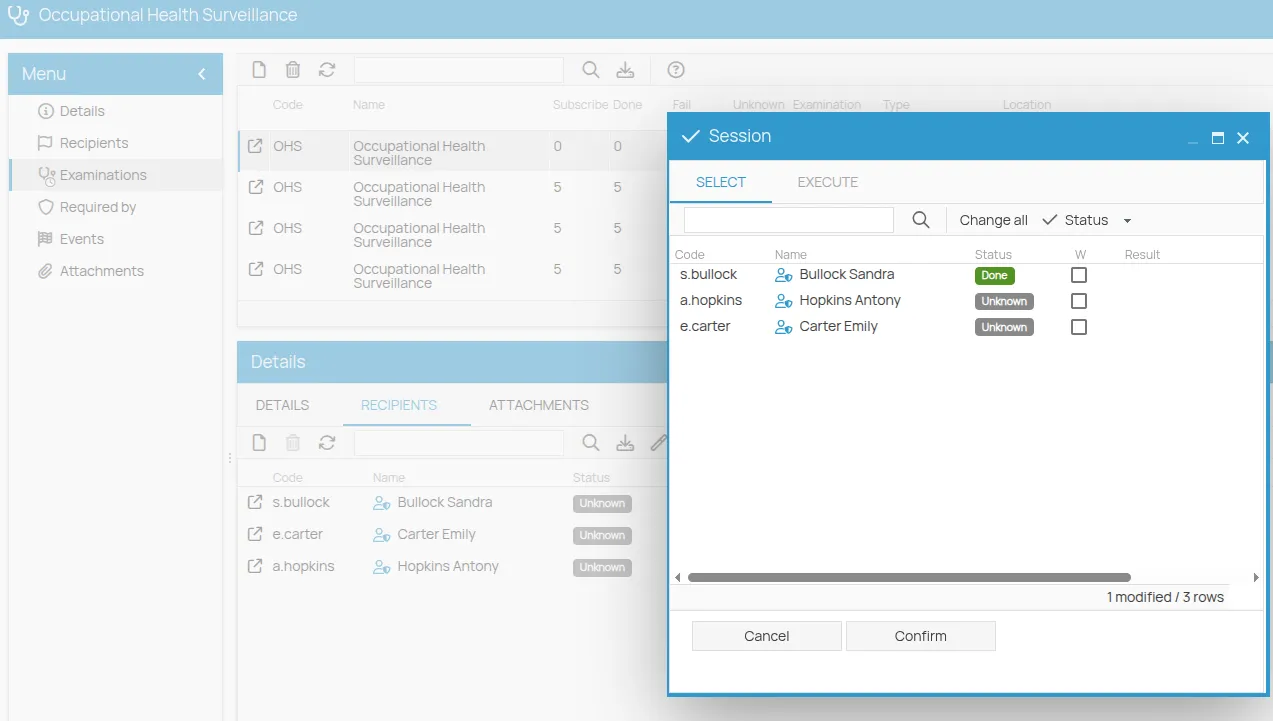
Bulk Entry
Section titled “Bulk Entry”- In the exam toolbar, click Guided Procedures > Bulk Edit
- The list of registered participants appears
- Click the status badge to change the result
- (Optional) Tick the “W” (warning) box to flag the record
- Click Confirm
Generate a Certificate
Section titled “Generate a Certificate”Once the outcome is “Passed”, you can issue certificates.
1. Mass Creation Wizard
Section titled “1. Mass Creation Wizard”- Click Guided Procedures > Mass Certificate Creation
- A list of recipients with outcome “Passed” appears
- Select recipients and click Confirm
2. From the Detail Page
Section titled “2. From the Detail Page”- Open the exam details
- Review start and end validity dates
- Click the medal icon to issue a certificate
The certificate is now valid and visible in the due date report.
Register an Existing Certificate (Past Surveillance)
Section titled “Register an Existing Certificate (Past Surveillance)”If you do not plan to schedule an exam, or need to record past health surveillance, you can register a certificate directly.
- Go to the Prescriptions list
- Select the desired prescription
- From the Recipients tab toolbar, assign the people
- Click Guided Procedures > Mass Certificate Creation
- Select the recipients
- Fill in certificate details and click Confirm, then Finish
Link External Certificates to Company Prescriptions
Section titled “Link External Certificates to Company Prescriptions”If an employee has valid certificates issued by third parties, they can be linked to internal prescriptions.
To link:
- Open People
- Select the employee and open their profile
- Go to the Certificates menu, click New, and enter data
- Select the new certificate
- In the Actions tab, click New
- Select the company prescription and click Save
The expiration date is inherited by default. To override:
- Double-click the row
- Uncheck “Inherit expiry date from certificate”
- Set a new date and Save
Manage a Certificate
Section titled “Manage a Certificate”In the Recipients tab, a certificate icon provides access to the certificate page, where you can:
- Download
- Attach files
-
Click the icon to open the certificate page
-
View all info related to the exam and result, plus optional notes
-
Editable dates include issue date and expiration
-
Click the Print icon to export the document
-
Use the ”…” button to choose from available templates
-
Click on the Print icon to print locally, or click Next to export or save the certificate in Files.