Training
The Training section is located within the Prevention Actions area of each project office.
From Actions, select the Training menu, which is structured on two levels:
- Courses: Define the company’s training needs.
- Editions: Establish the planning of course execution and renewal dates.
Within the Training section, you can also:
- Register an existing certificate (e.g., for previous training or training without prior planning).
- Plan an edition.
- Record the outcome of a planned training edition.
- Produce a certificate or upload an external one.
- Associate an employee’s certificates with company courses and monitor their expiration. (e.g., a course issues certificates that attest to various skills, equalization of externally acquired training with company-delivered courses, or registration of previous training from an individual’s profile).
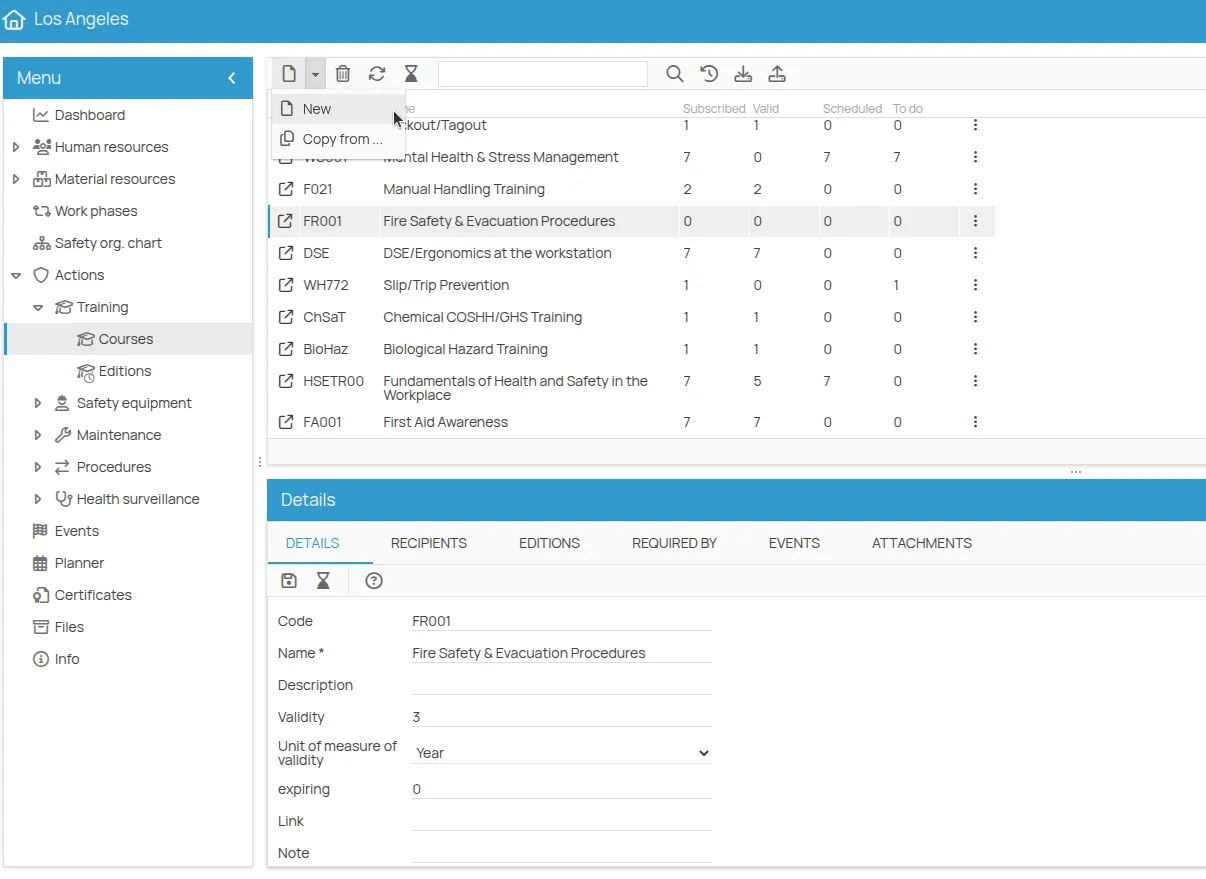
Adding a New Course
Section titled “Adding a New Course”- Click on New in the top left to choose the course type to add. You can choose between adding a course using the Copy tool or adding a New course, which can be freely configured through the dedicated interface that will open after clicking. In this example, we will choose to add a standard general training course.
- Click on Save.
The new row corresponding to the training course will now appear within the window, with all indicators at zero. (If you don’t see any changes, simply click Refresh in the toolbar).
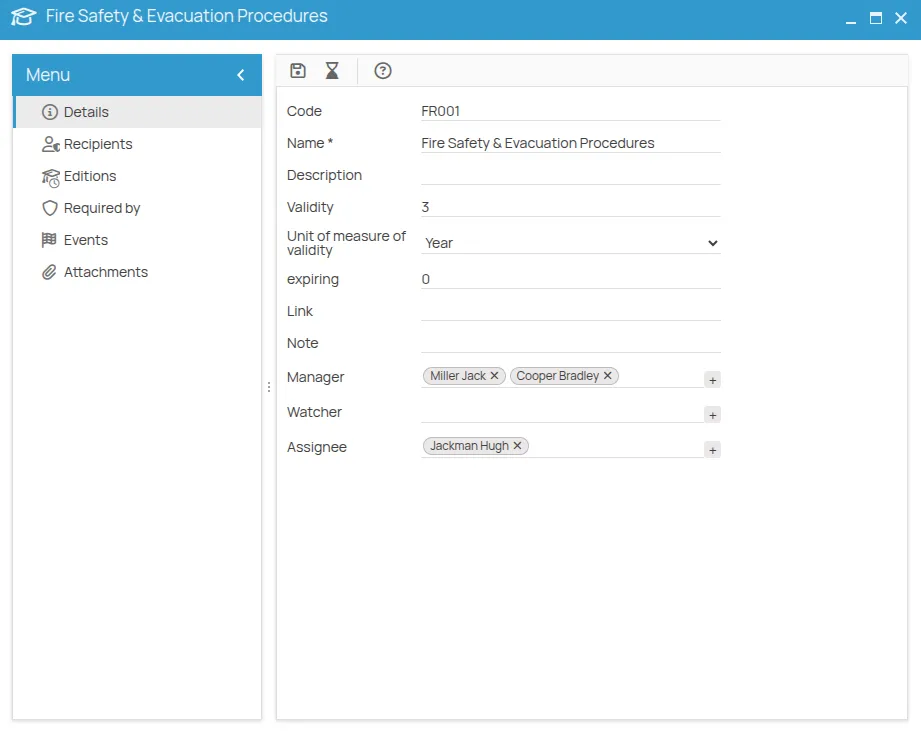
A double click on the row or the “link” icon will take you to the course card. From here, you can view and manage all information related to the course, participants, edition dates, and more in detail.
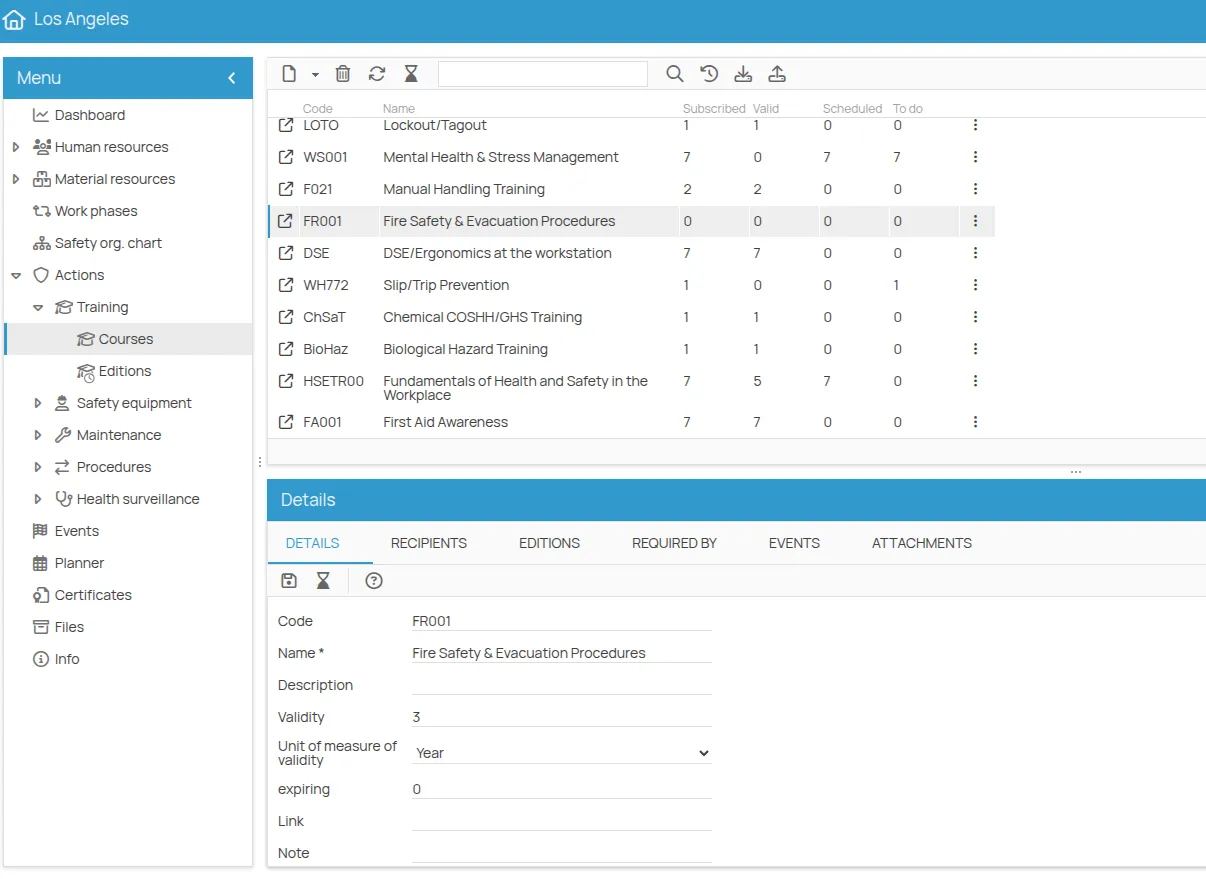
Managing a Course
Section titled “Managing a Course”A course can be managed from both the “Details Tab” and the “Course Card”.
- The Details gather the main course information:
- Name
- Description
- Validity, which is the time interval between a certification and its renewal.
- Expiring, which is the number of days before the expiration date when that specific activity is considered to be in an “expiring” status.
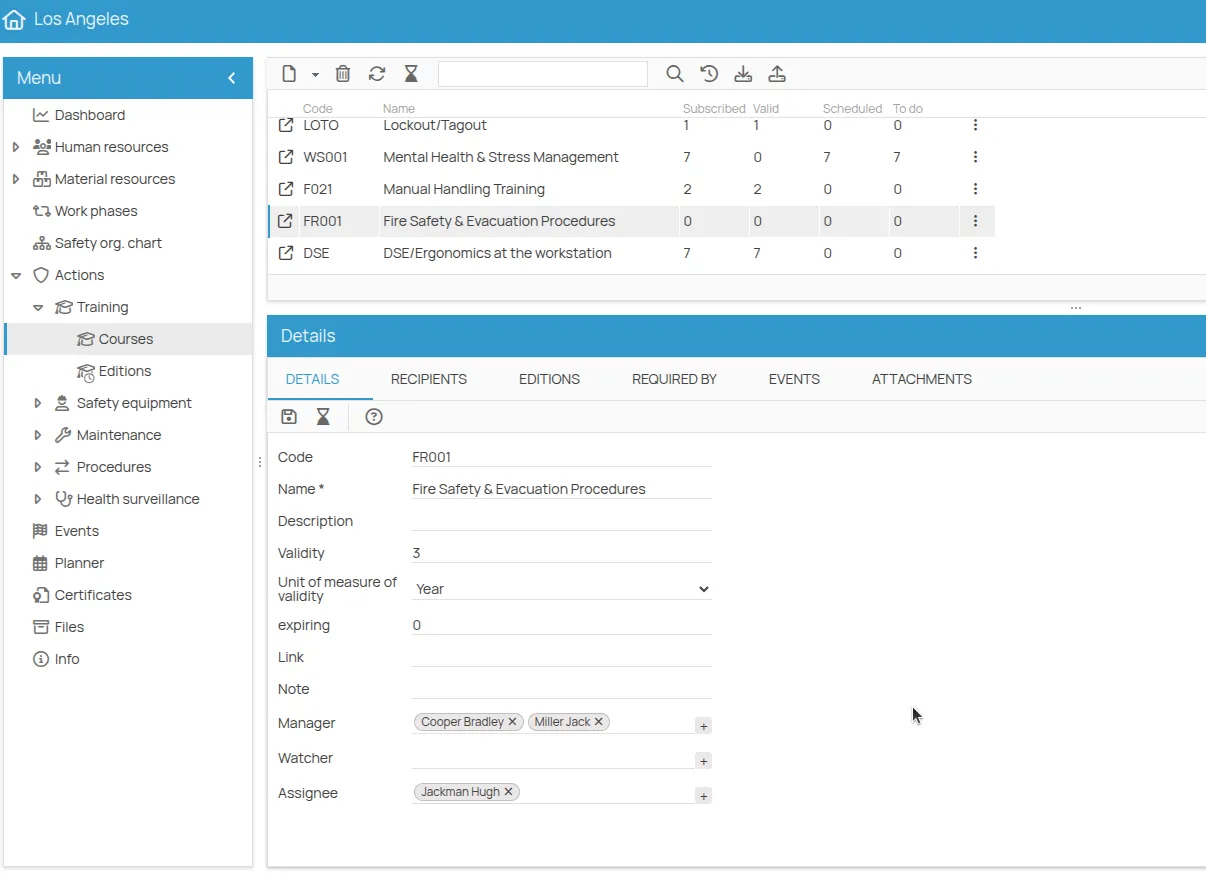
- Indication of the “Course Manager,” “Assigned,” and “Observer.”
With the ”+” button, you can choose between People, Office Users, and Roles previously defined in the Office Safety Organization Chart. You can associate multiple subjects from different categories with the same role for a course. This association is automatically inherited in subsequently planned Editions for the same course.
- In Recipients, you can view the people from the office already enrolled in the course.
- In Editions, the editions of the selected course are displayed in chronological order from most to least recent.
- In Requested by, all elements whose risks will be mitigated by the administration of the training course are listed.
- In Attachments, you can associate documentation related to the course:
- By adding a link to an existing file in “Files.”
- By uploading a new file.
Adding Recipients to a Course
Section titled “Adding Recipients to a Course”Recipients are the people who need to attend training courses based on the risks they face while performing their work. These can depend on their role, area, work equipment, or work phase. Each worker can be enrolled in one or more courses, mandatory or optional, but always necessary for their health and safety.
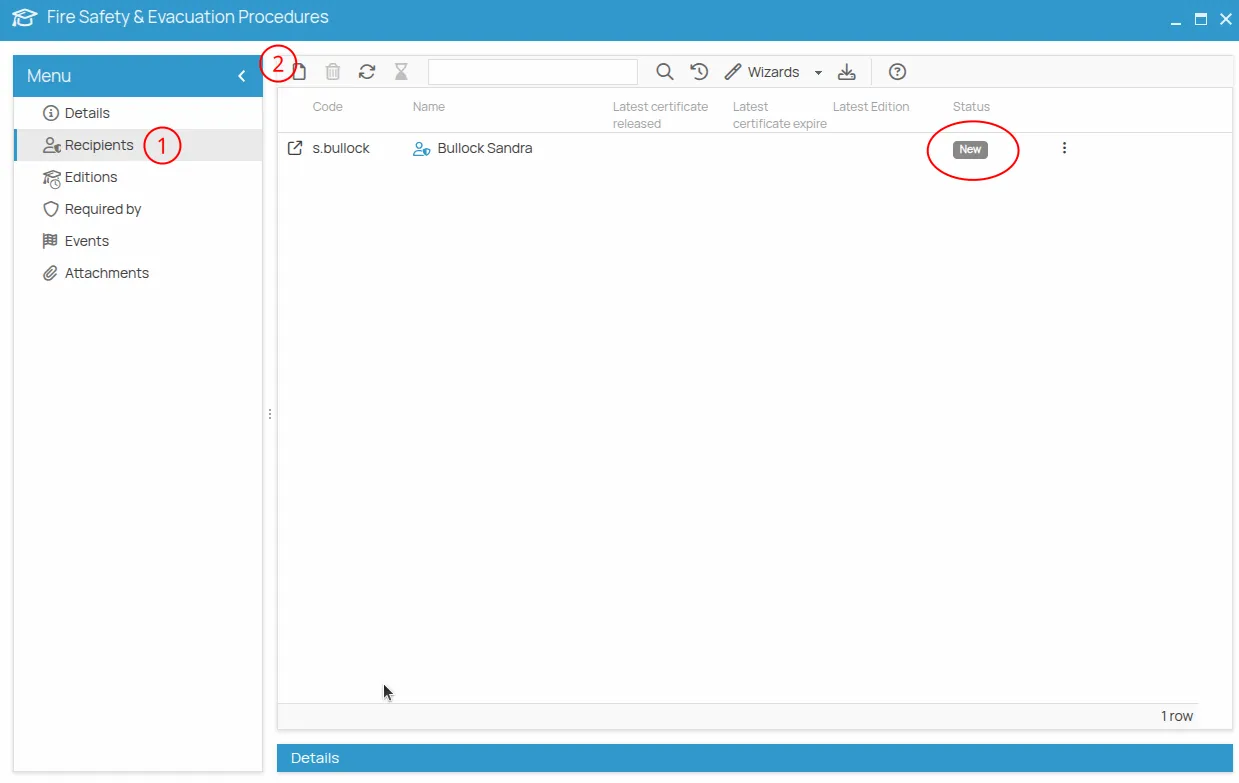
- Click on Recipients.
- Click on New.
- Select the employees to be trained for the chosen course (press Shift for multiple selections) and click Save.
- All course participants will be listed as Recipients, and each will show a Status:
- “New” until managed.
- “Valid” or “Expired” according to the dates reported in any training certificates already registered for the employee.
- “Expiring” if the certificate’s expiration is approaching. The number of days preceding the expiration is set in the course’s “Expiring” field.
Associating Resources
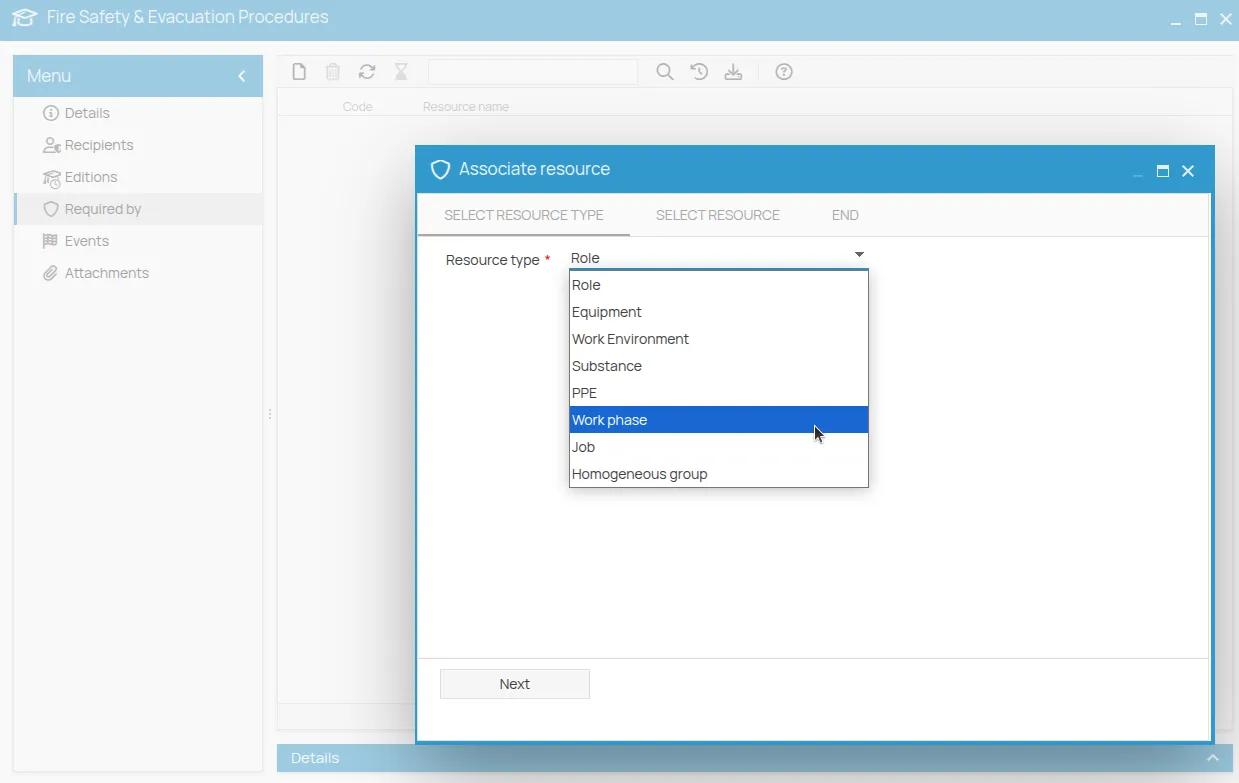
Section titled “Associating Resources”From the course menu item “Requested by”, you can indicate which company resources necessitate the course. This way, you can keep track of the link between the course and specific training needs derived from duties, equipment, work environments, etc.
- Select the resources to associate from:
- Role
- Job Position
- Equipment
- Environment
- Substance
- Work Phase
- PPE
- Click Next to select from the cataloged items.
- Select the resources and click Confirm, then Done.
Planning an Edition
Section titled “Planning an Edition”Once recipients are associated with the course, you can plan an edition.
- From the Editions menu, click New.
- Select the Course via “Select”. All available courses for the office will be displayed. If the desired course is not found, you need to create it in the “Courses” section.
- Verify the validity of the course.
- Indicate the date, edition type (Base/Update), instructor, and location.
- The roles of Manager, Assigned, and Observer are inherited but can be modified for a specific edition. These individuals, if users, will also receive notifications for this activity.
- Click Save.
Enrolling People in an Edition
Section titled “Enrolling People in an Edition”- Select the edition.
- Click Recipients, then New. Only people already enrolled in the course will be suggested. If no recipients have been associated with the course, no people will be displayed for enrollment in the edition.
- Select the people you want to enroll in the edition and click Save.
The initial training status will be To be completed.
Recording the Outcome of an Edition
Section titled “Recording the Outcome of an Edition”You can record the outcome of an edition in two ways: individually or in bulk, depending on the number of enrollees.
Individual Mode
Section titled “Individual Mode”- Open the enrollment detail card by double-clicking on the enrollee’s row.
- Fill out the form by selecting the outcome:
PassedorFailed. - Save.
Bulk Mode
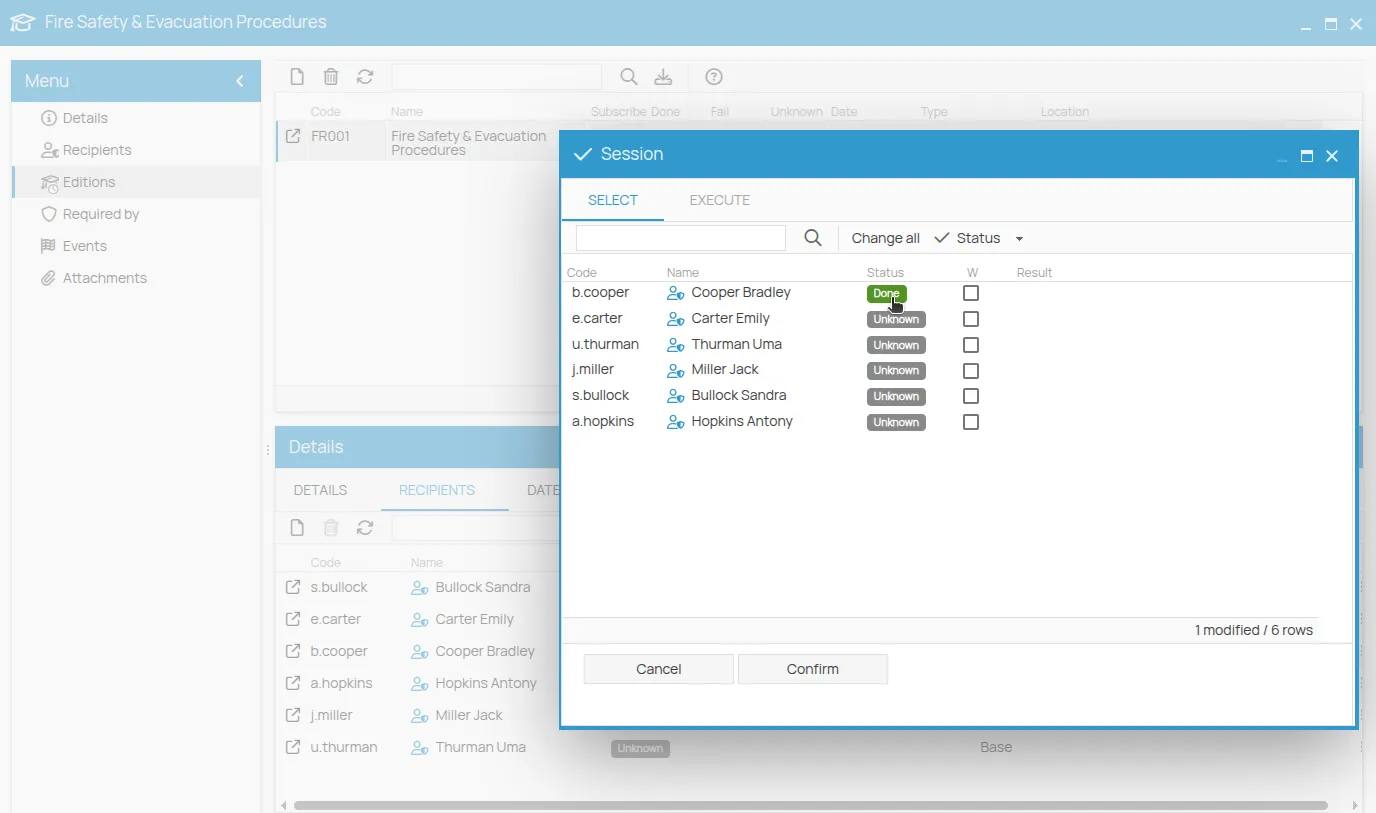
Section titled “Bulk Mode”- From the edition’s toolbar, click Wizards, then select Bulk Edit.
- The list of enrollees for the edition opens.
- Click on the status badge to change it.
- (Optional) Check the “W” (warning) box to visually highlight a record that requires attention: an icon will be shown next to the corresponding row.
- Press Confirm to save all changes.
Producing a Certificate
Section titled “Producing a Certificate”After recording the outcome of the edition as “passed”, you can issue certificates:
1. Wizard for Bulk Creation
Section titled “1. Wizard for Bulk Creation”- Click Wizards in the toolbar.
- Select Bulk Certificate Creation.
- The list of enrollees for the edition is shown.
- Select the people for whom you want to issue the certificate.
- Click Confirm.
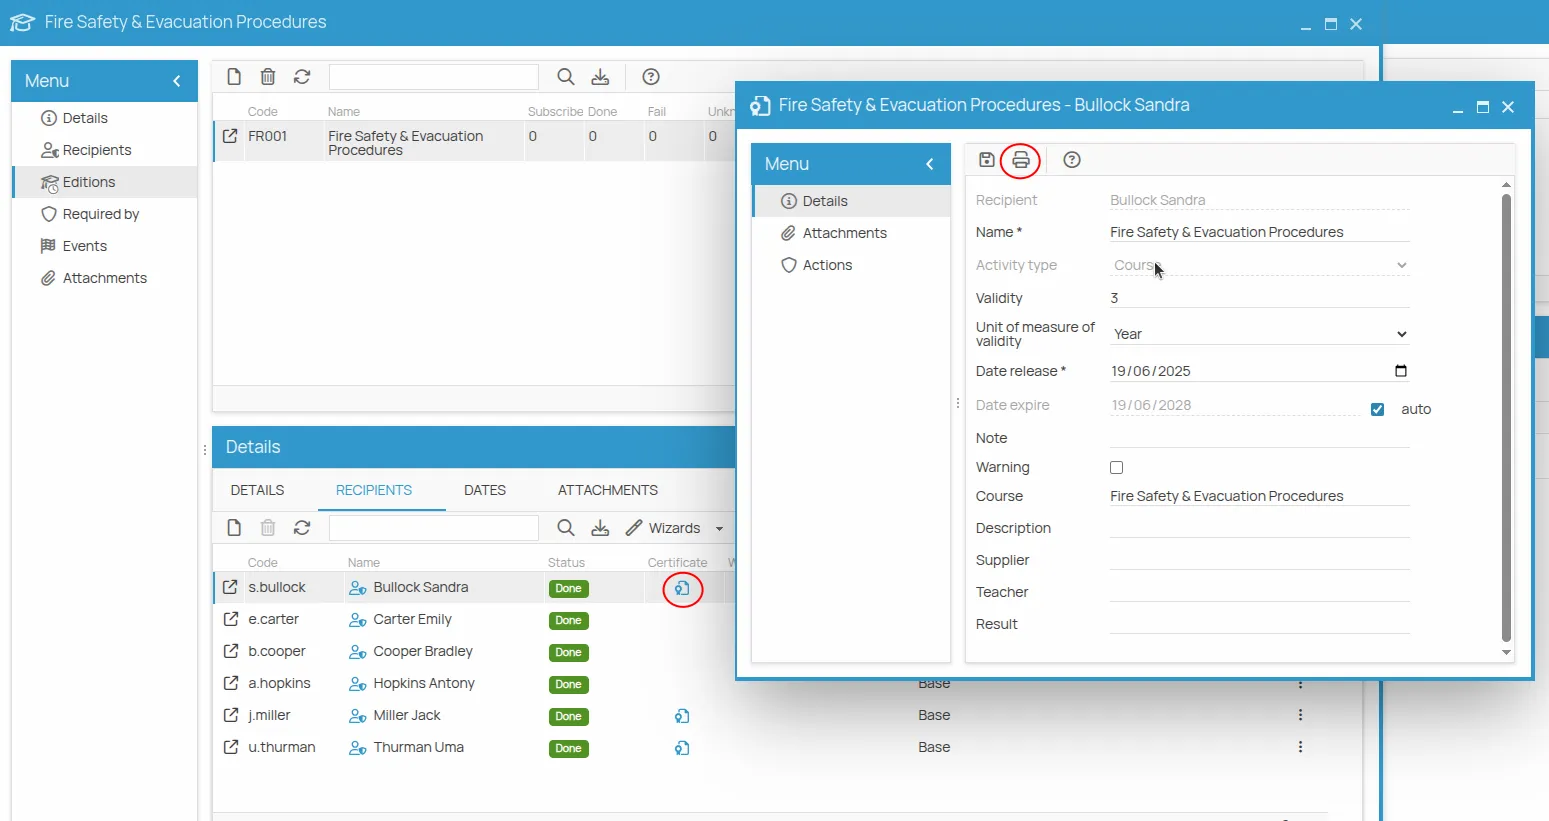
2. Specific Issuance from Enrollment Detail
Section titled “2. Specific Issuance from Enrollment Detail”- Open the enrollment detail (double-click on the row or click the icon).
- Check the start validity and end validity dates.
- Click the rosette icon; this will automatically issue a certificate for the participant.
Once done, the certificate is valid and visible in the expiration calendar.
Registering a Certificate (Previous Training)
Section titled “Registering a Certificate (Previous Training)”If you do not wish to plan an edition or if you want to register previous training, you can register a certificate. This operation can be performed from the list of “Courses” in the office menu.
- Click on Courses.
- Select the desired course.
- In the toolbar of the “Recipients” tab, associate the participants to be certified.
- Click Wizards > Bulk Certificate Creation.
- Select the participants.
- Fill in the certificate details and click Confirm.
- Click Done.
Associating an Employee’s Certificates with Company Courses
Section titled “Associating an Employee’s Certificates with Company Courses”It’s possible for a worker to possess valid certificates issued by third parties or attestations referring to other courses. These can be equated to a company course by associating the corresponding certificate.
To associate:
- Go to the People menu.
- Select the worker and open their card.
- From the Certificates menu, click New and fill in the data.
- Select the newly created certificate.
- In the Actions tab, click New.
- Select the company reference course and click Save.
The expiration date is automatically inherited. To change it:
- Double-click on the row.
- Uncheck the “Inherit expiration date from certificate” flag.
- Enter the new date and Save.
Managing a Certificate
Section titled “Managing a Certificate”In the Certificate column of the “People” tab, the certificate icon is now visible, allowing access to the certificate card, from which you can:
- Archive
- Download
- Attach a third-party certificate.
- Click to open the certificate card.
- All information related to the edition and result is reported here, along with notes and optional fields. The editable dates refer to the certificate’s issue and expiration.
- To export the document, click the Print icon.
- Click on ”…” to access the list of available templates.
- Select the desired template from the list and click Save, then next to access the document preview.
- Click the “Print” icon for the local printer, or click “Next” to export or archive in “Files”.
Attachments
Section titled “Attachments”In “Attachments,” you can associate files related to the course:
- By adding a link to existing files in “Files”.
- By uploading a new file.
Associating an Employee’s Certificates with Company Courses
Section titled “Associating an Employee’s Certificates with Company Courses”It can happen that a worker obtains certificates and attestations with different names from those of courses taken within the company, but with the same training content. Alternatively, a company course, conducted in multiple sessions that characterize the same edition, may grant the worker more than one certificate to attest to different competencies. Furthermore, it may be necessary to upload all certificates a newly hired worker possesses in one session.
To monitor the expiration date reported on these certificates and to equate training obtained elsewhere with that performed within the company, you can create the corresponding certificate within 4HSE and associate it with the reference course.
To associate an employee’s certificate with a company course:
- Go to the People menu.
- Select the worker whose certifications you want to update, then open their card.
- Select the “Certificates” menu. Using the “New” button, create the certificate in 4HSE, selecting the type of action it refers to and entering the document details in the appropriate sections, then save.
- Select the newly created certificate, which will appear in a new row.
- In the Details window below, select the Actions tab.
- Select New.
- Associate the company course to which you want the certificate to refer and save. The certificate’s expiration date will be automatically inherited and shown in the expiration calendar.
To modify the certificate’s expiration date, once the course is associated, double-click on the new row displayed in the “Actions” tab and uncheck the “Inherit expiration date from certificate” box, then enter the new expiration date and save.