Forms Linked to Actions
Forms linked to actions are a key tool for operational safety management in 4HSE. This feature allows you to integrate checklists, attendance registers, or custom forms directly into the workflow of preventive actions.
Planned activities are enhanced with structured documents: in addition to attaching external files, the system allows you to complete and attach predefined templates.
Why Use Linked Forms
Section titled “Why Use Linked Forms”Associating forms with actions helps structure and improve data collection during activities, making the process more consistent, traceable, and efficient.
-
Standardization of information Forms define preconfigured checklists and fields, ensuring that each activity is documented in a uniform and comparable way over time.
-
Activity traceability Forms are automatically linked to the items generated during the activity (for example, certificates or individual sessions), keeping all relevant information connected.
-
Real-time data collection Forms can be completed directly during the execution of the activity, also from mobile devices, reducing errors, omissions, and subsequent transcription tasks.
Configuration and Completion
Section titled “Configuration and Completion”To use this feature correctly, it is important to distinguish between two phases:
- Configuration: Define the structure and contents of the form. This operation is performed only once at the Action level.
- Completion: Enter the data required by the form during the activity. Each save generates a static document linked to the performed activity.
Form Configuration
Section titled “Form Configuration”Forms are defined at the action level. In this phase, you determine which “template” will be used each time the action is executed.
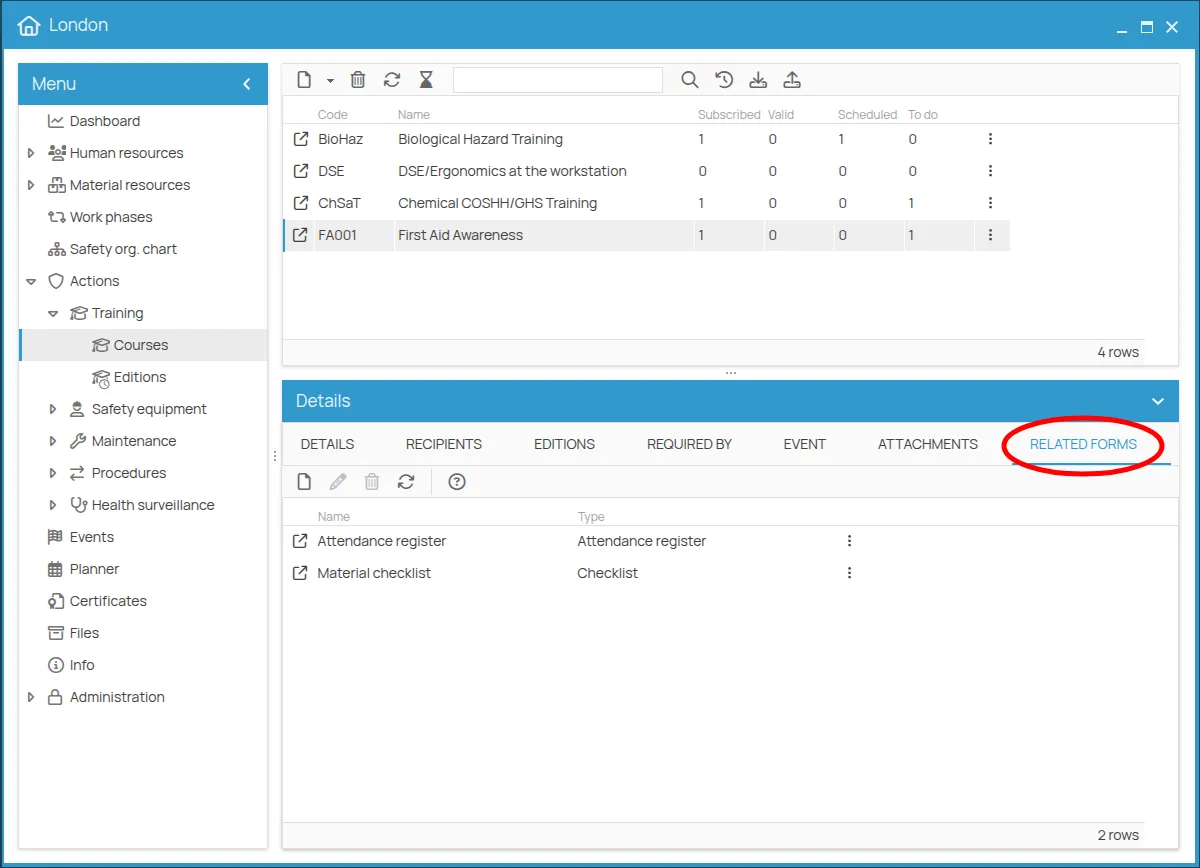
Within the action detail view, there is a Linked Forms tab. In this section, you can view the list of already active forms, create new ones, or remove those no longer needed.
Creating a New Form
Section titled “Creating a New Form”To create a new form, click the New button. A guided wizard will open to assist you with the configuration.
In the first step, you must define the main information of the form.
1. General Information
Section titled “1. General Information”Identifies the form within the system.
It is recommended to use a clear and descriptive name that makes its purpose and context of use easy to understand.
The Type defines the type of form you want to configure.
The availability of form types depends on the nature of the selected action: there are universal templates applicable to any preventive activity, and specific templates dedicated to particular operational workflows.
Below is a detailed list of the available types:
| Form Type | Applicability | Description |
|---|---|---|
| Simple Checklist | All actions | Customizable form composed of different field types: checkboxes, text inputs, text areas, dropdown menus, radio buttons, selection groups, and signature. Includes completion date. |
| Advanced Checklist | All actions | More comprehensive form that allows adding extra fields and setting custom completion rules. |
| Course Attendance Register | “Training” actions | Specific form for recording participant attendance during training sessions. |
| Evacuation Drill | “Procedure” actions | Structured form for recording and evaluating emergency and evacuation drills. |
2. Content Definition
Section titled “2. Content Definition”In the final step of the wizard, you can define the content of the form.
Simple Checklist
Section titled “Simple Checklist”This tool is ideal for creating custom operational forms, where the operator can confirm the completion of activities, enter textual information, make selections from predefined lists, or provide a signature.
Once this type has been selected and the general information has been saved, the system enables an intuitive editor that allows you to configure the form by defining the fields associated with the action.
Available field types
Section titled “Available field types”The editor provides the following field types, which can be added using the dedicated buttons at the bottom of the editor:
| Field type | Description |
|---|---|
| Checkbox | Single checkbox to confirm the completion of an activity. |
| Text input | Single-line field for entering short text. |
| Text area | Multi-line field for entering longer text. |
| Dropdown menu | Single selection from a list of predefined options. |
| Radio buttons | Single selection from a set of options displayed as buttons. |
| Selection group | Multiple selection from a set of options (multiple checkboxes). |
| Signature | Dedicated field for applying a digital signature. |
For dropdown menu, radio buttons, and selection group fields, you need to define the available options directly in the editor. Each option can be added or removed individually.
Field configuration
Section titled “Field configuration”For each field, you can specify:
- Question or label: the text that will be shown to the operator during completion.
- Description (optional): an additional note or instruction to guide the operator.
Available editor operations
Section titled “Available editor operations”Using the editor, you can:
- Add new fields: select the desired field type using the buttons at the bottom.
- Reorder fields: drag items to define the logical sequence the operator should follow.
- Delete fields: remove fields that are no longer needed.
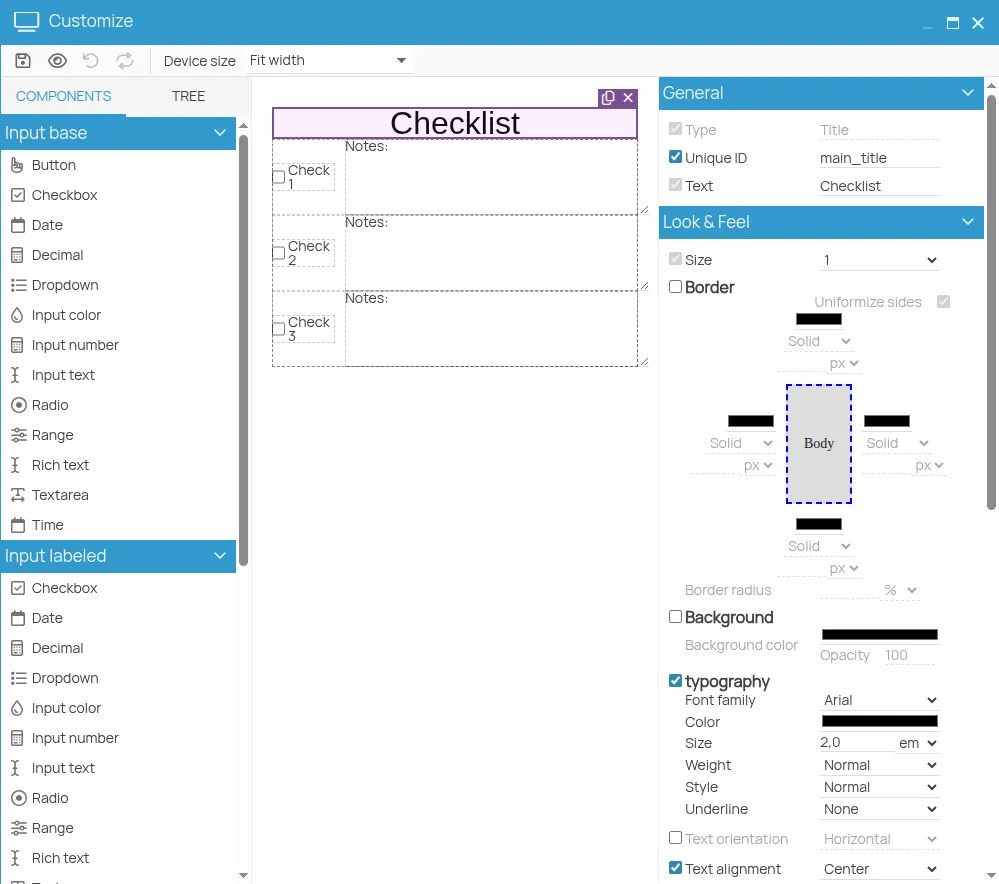
 simple checklist editor
Once you have completed the form definition, click Save to activate it. From that moment on, the form will be available and ready to be completed each time the action is executed (for example, during an inspection or maintenance activity).
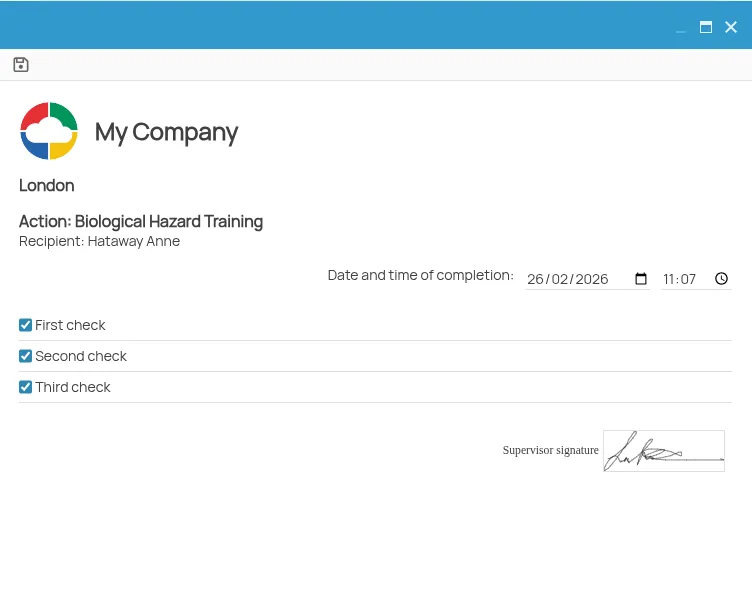 simple checklist completion screen
Where the Simple Checklist Is Completed
Section titled “Where the Simple Checklist Is Completed”The simple checklist completion will be prompted when creating a new certificate related to the action to which the checklist has been associated.
Advanced Checklist
Section titled “Advanced Checklist”By selecting the Advanced Checklist type, the 4HSE Designer opens—a flexible tool that allows you to go beyond a simple task list.
When opened, the system provides a predefined checklist template as a starting point. The Designer adapts to the user’s experience and needs: you can drag elements one below the other, duplicate them, or create actual layouts and configure dynamic behaviors to be applied during form completion.
Despite its advanced features, it remains intuitive: simply drag & drop elements into the workspace to configure the form and select an element to open its customization panel.
 advanced checklist editor
Where the Advanced Checklist Is Completed
Section titled “Where the Advanced Checklist Is Completed”The advanced checklist completion will be prompted when creating a new certificate related to the action to which the checklist has been associated.
Course Attendance Register
Section titled “Course Attendance Register”The Course Attendance Register type is specific and exclusive to Training actions.
Unlike checklists, this form does not require manual configuration of content: the system automatically generates the register structure.
To activate it, simply create the form by selecting Course Attendance Register as the type and save. From that moment on, the form will be associated with all course sessions linked to the training, automatically importing the list of workers enrolled in each session.
Where the Attendance Register Is Completed
Section titled “Where the Attendance Register Is Completed”- Access the Sessions section of the training courses;
- Locate the course session to which the attendance register has been associated;
- Select the relevant session date (DATE tab);
- Click the Run button.
The system will open the register with preloaded names, allowing the assigned person to record attendance in real time, including entry and exit times along with participant signatures.

4HSE Predefined Templates
Section titled “4HSE Predefined Templates”In addition to generic checklists, 4HSE provides predefined templates designed to meet specific regulatory and operational requirements.
The system displays templates in the Type dropdown menu only when they are consistent with the category of the action you are configuring. For example:
- The Evacuation Drill template can only be selected for Procedure actions.
- The Fire Extinguisher Maintenance template is available exclusively for Maintenance actions.
Advantages of Predefined Templates
Section titled “Advantages of Predefined Templates”- Ready-to-use structure: the form is already configured with the necessary fields (e.g., evacuation times, inspection outcomes), allowing you to be operational within seconds.
- Full flexibility: even though the form is ready, the system still opens the 4HSE Designer. You can use the form as is or modify it by adding or removing fields to adapt it to your company standards.
- Standardization: ensures that all technicians or safety managers collect the same information in a uniform way.
Where Predefined Templates Are Completed
Section titled “Where Predefined Templates Are Completed”The completion of predefined templates will be prompted when creating a new certificate related to the action to which the template has been associated.
Executing Forms in the Operational Workflow
Section titled “Executing Forms in the Operational Workflow”Forms are integrated into the operational workflow of activities. There is no need to search for them in a separate archive: the system automatically prompts them when needed.
Currently, there are two main access points for completion, depending on the type of activity.
1. Completion via Toolbar
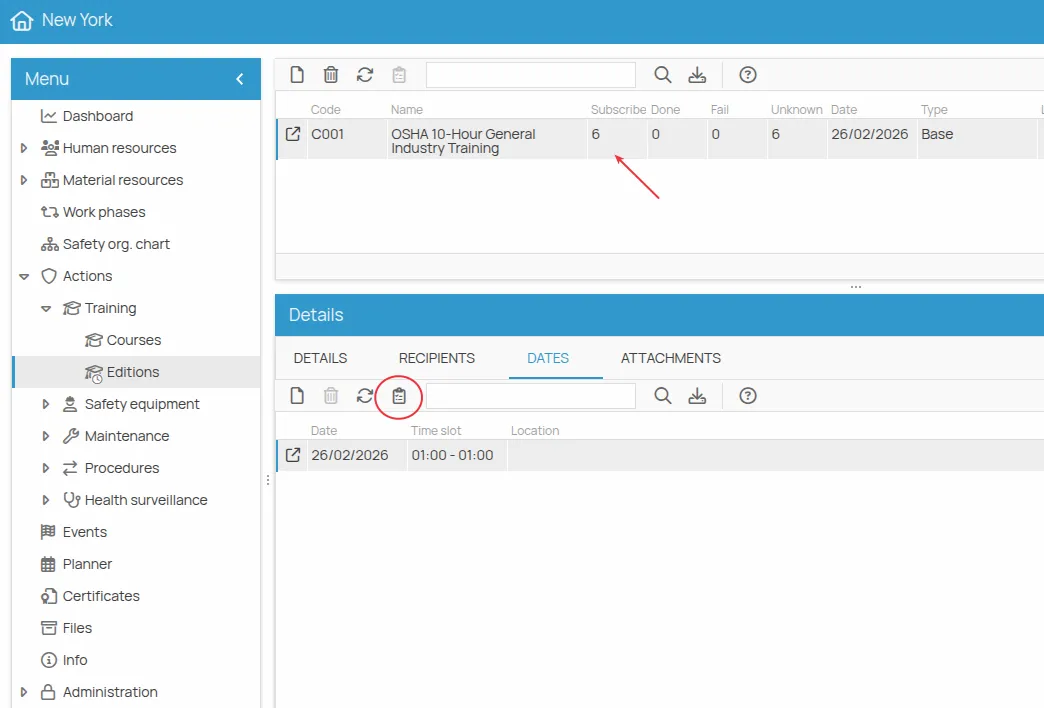
Section titled “1. Completion via Toolbar”This is the case, for example, for a course attendance register. The usage mode of this type of form has already been described in the dedicated section; a brief summary is provided below.
In the Sessions sections, by clicking on a session date, the system activates the “Form Completion” button in the toolbar.
By clicking the icon:
- the list of forms associated with that context opens;
- you can select, open, and complete the desired form.
This is the operational path intended for those responsible for tracking attendance.
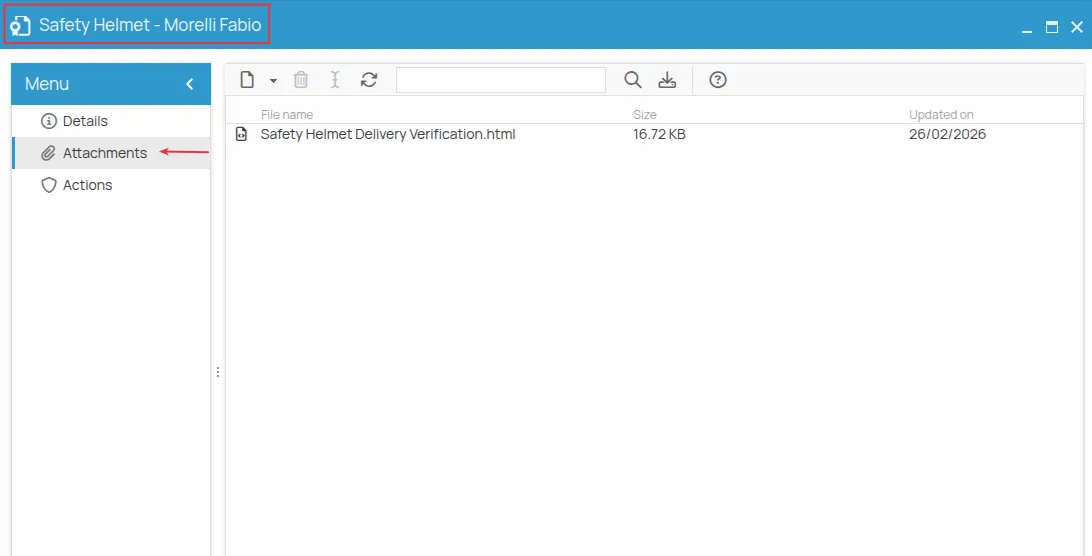
Where to View the Saved Form
Section titled “Where to View the Saved Form”Once saved, the register becomes a document attached to the session date. To view it:
- Open the session date detail (double click);
- Click on the Attachments section, where the generated
.htmlfile will be available.
2. Completion During Certificate Issuance
Section titled “2. Completion During Certificate Issuance”For all other types of forms, completion is linked to the generation of documentary evidence.
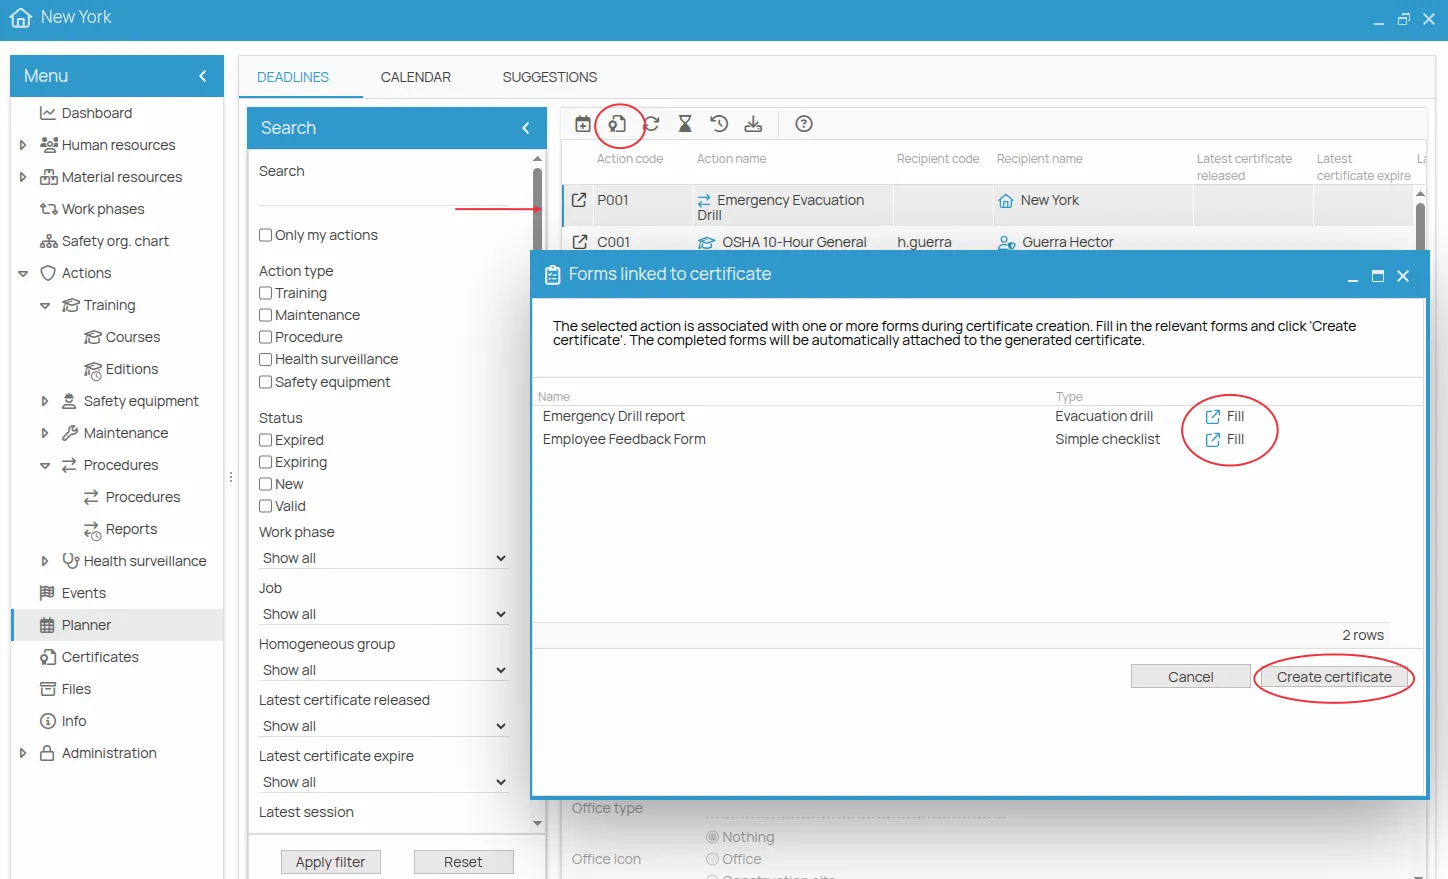
When issuing a new certificate related to an Action that has linked forms, the system intervenes in the workflow:
- Automatic prompt: before finalizing the certificate, 4HSE displays the associated form completion screen.
- Data integration: the data collected in the form (e.g., checklist results) becomes an attachment to the certificate being issued.
By clicking the “Complete” button, you access the form completion screen, where you can enter the required data and provide a signature where applicable.
By clicking “Save”, the form is saved and attached to the certificate and is no longer editable.
Form Completion States
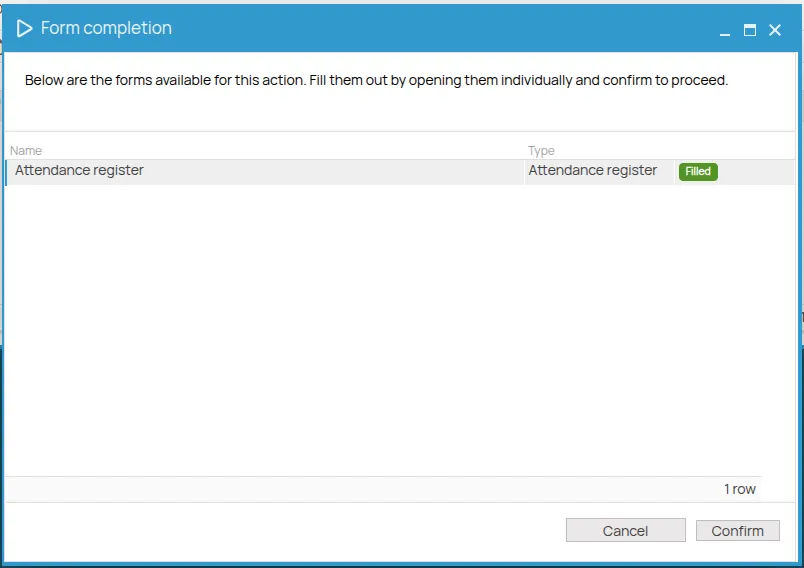
Section titled “Form Completion States”During completion, the form can have two main states:
Draft Allows you to retain entered data without completing the form. In this state, the form remains editable and can be reopened temporarily to complete or update information.
Final Save Confirms form completion and concludes the process. After final saving, the content is no longer editable.
Example: PPE Delivery Checklist Attached to the Certificate
Section titled “Example: PPE Delivery Checklist Attached to the Certificate”A company must manage the delivery of personal protective equipment (PPE) to its employees, ensuring that each delivery is carried out correctly and fully documented.
To support this process, a form linked to the PPE delivery certificate is created using the Checklist style.
Creating the Form
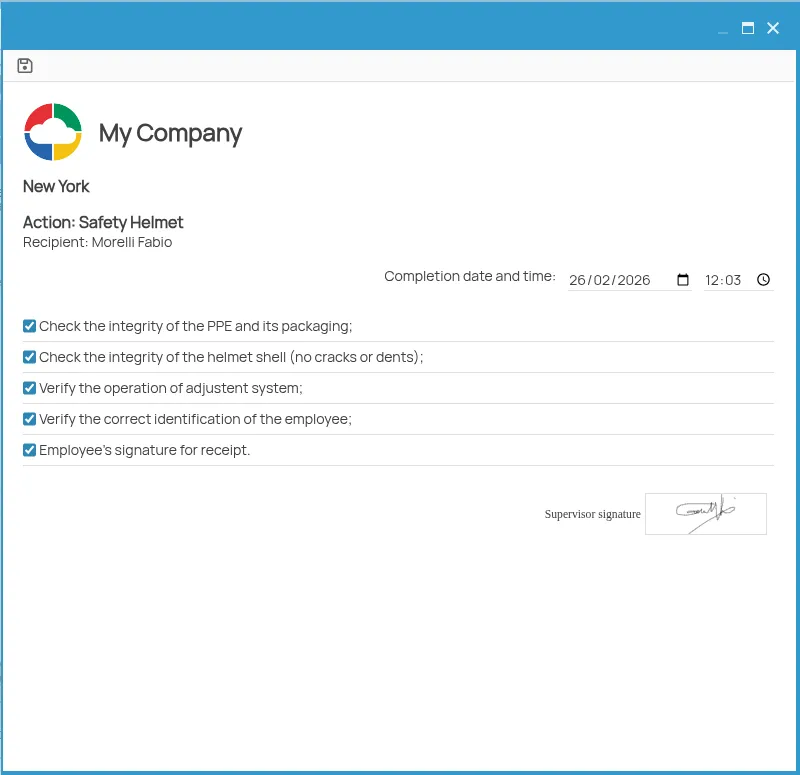
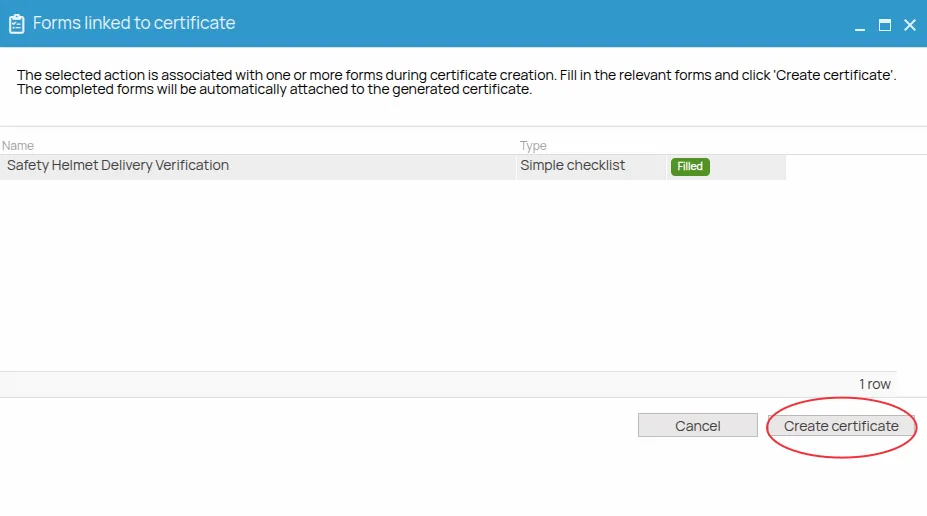
Section titled “Creating the Form”The safety manager creates a new form named:
Safety Helmet Delivery Verification
The form includes the following checks:
- Verification of PPE and packaging integrity;
- Shell integrity (absence of cracks or dents);
- Proper functioning of the adjustment system (headband);
- Verification of correct employee identification;
- Employee signature for receipt;
This checklist allows the assigned person to follow a standardized procedure during each delivery.
Completion During Delivery
Section titled “Completion During Delivery”When a delivery is made and the certificate is being issued, the system makes the associated checklist available.
The delivery officer:
- opens the form via the “Complete” button;
- fills in the required checks;
- signs the form;
- performs the final save.
Once the completion of the necessary forms is finished, the assigned person proceeds with certificate issuance by clicking Create Certificate.
Final Result
Section titled “Final Result”Upon final saving:
- the checklist is generated as a document;
- the system prompts the user to select the destination folder where the file will be saved;
- the document is archived in the filesystem;
- the file is automatically attached to the PPE delivery certificate;
- the checklist becomes an integral part of the delivery documentation.
In this way, the document is archived within the project folders and directly accessible from the certificate, ensuring traceability and ease of consultation.