Copying Elements
The Copy from feature allows you to replicate existing elements from a source office to a destination office, preserving linked relationships and simplifying the creation of similar structures across multiple contexts.
Copy Logic and Process
Section titled “Copy Logic and Process”The copy process is based on the ability to replicate an element from a source office to a destination office. This functionality is not limited to user-created elements, but also extends to predefined content available in 4HSE.
All elements that can be copied follow the same three-step guided procedure:
- Select
- Filter
- Copy
Distinction Between Offices and Elements
Section titled “Distinction Between Offices and Elements”The copy system distinguishes elements based on the type of office in which they were created:
-
Template Elements created in template offices, designed as reference models with standardized and pre-filled data.
-
Non-Template Elements created in “real” offices within the user’s project.
-
Partner Templates Template offices created by a partner, visible only to that partner’s clients.
Interface and Available Options
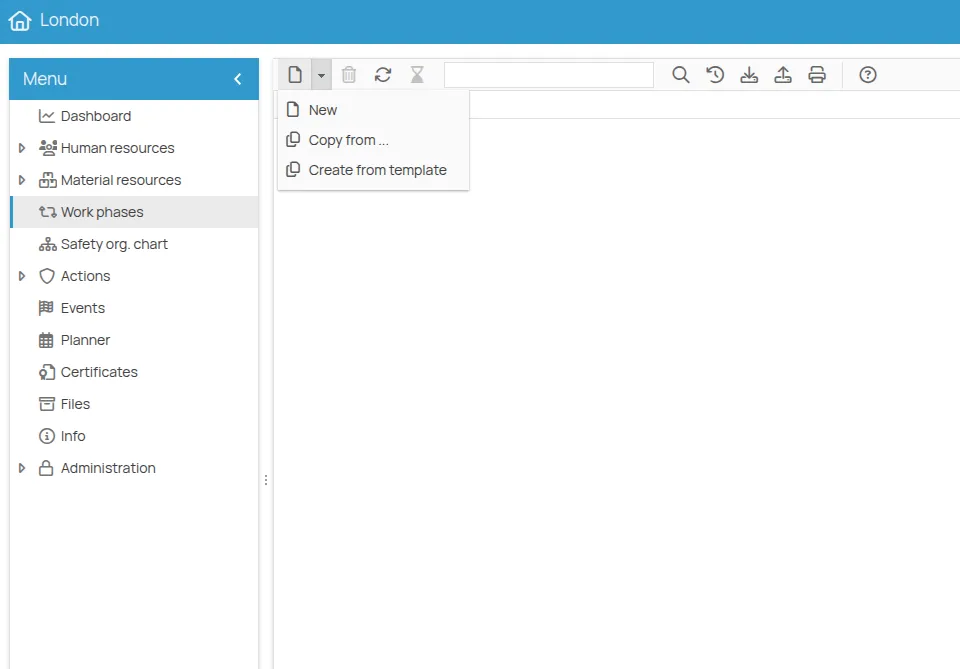
Section titled “Interface and Available Options”When you want to create a new element, the toolbar in the section includes the New button. Clicking this button reveals three menu options:
- New
- Copy from…
- Create from template
Copy from…
Section titled “Copy from…”This option allows copying existing elements from offices of projects you have access to.
In the toolbar of the element list, a filter is available:
- This project: shows only elements from the current project
- This office: shows only elements from the current office
Create from Template
Section titled “Create from Template”This option allows creating elements by copying them from template projects.
Two additional filters are available in the element list toolbar:
Source Filter
Section titled “Source Filter”- Partner: shows only partner templates
- 4HSE: shows only 4HSE global templates
Country Filter
Section titled “Country Filter”- France
- Germany
- Italy
- Spain
- United Kingdom
- USA
Guided Procedure (Common Steps)
Section titled “Guided Procedure (Common Steps)”All elements follow this three-step guided procedure. Below is a general description of each step.
1. Select
Section titled “1. Select”This step displays a table containing all copyable entities of the projects/offices you have access to, depending on the option selected (Copy from… or Create from Template). The user selects one or more elements to copy to the destination office.
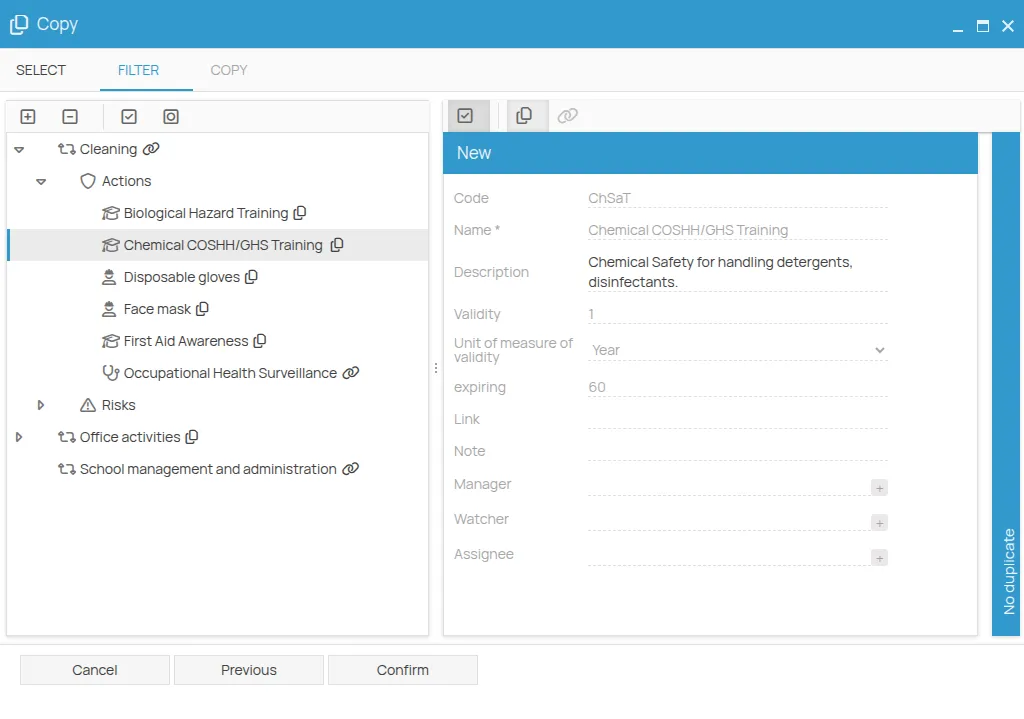
2. Filter
Section titled “2. Filter”The screen is divided into two main areas:
- Navigation Tree: list of elements selected in the previous step with their relationships and hierarchy.
- Detail View: right panel showing the details of the selected element in the tree.
The detail panel indicates the status of each sub-element relative to the destination office (e.g., already present → will be linked, not present → will be created).
The user can choose for each sub-element whether to link it, create a copy, or exclude it.
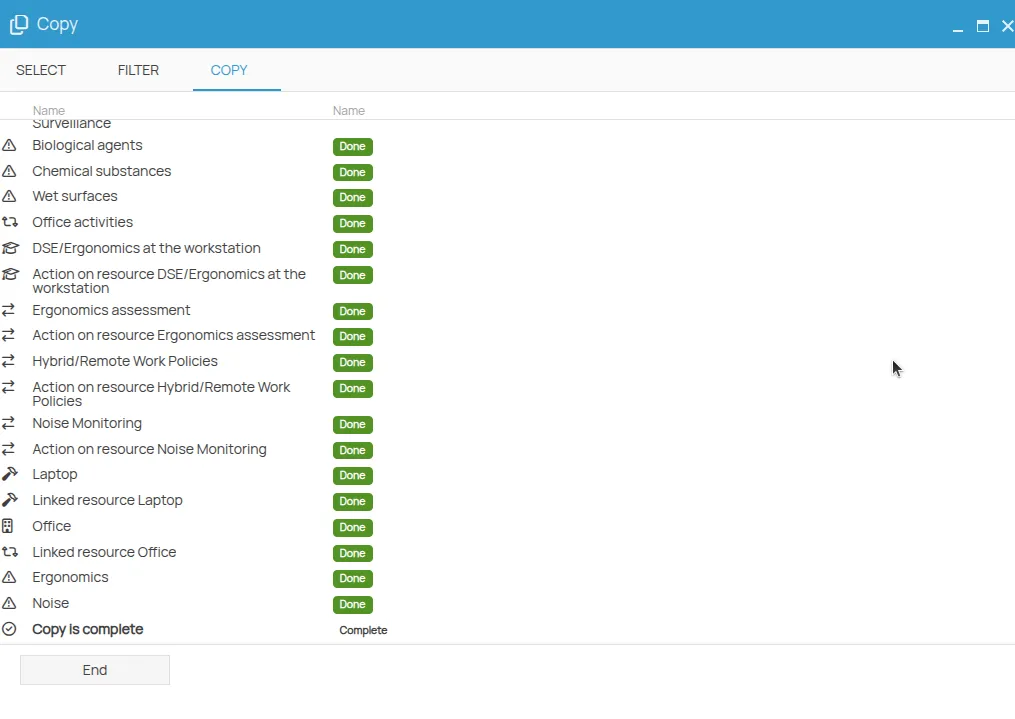
3. Copy
Section titled “3. Copy”In this step, the operation is executed, and the copy outcome is displayed: created elements, linked elements, and any errors or conflicts encountered.
Detailed Example: Copying a Work Phase
Section titled “Detailed Example: Copying a Work Phase”To illustrate the process, let’s consider the work phases section of two different offices, which we will use as an example.
We have a project called Acme Inc., in which we created two offices:
- London
- Manchester
Now, let’s assume we want to copy the work phases:
- Cleaning
- School management and administration
from the Manchester office to the London office.
Each of these phases has associated:
- material resources
- actions
- hazards
To start the copy procedure for work phases, go to the work phases section of the destination office, in this case London.
Expand the New button
Guided Procedure
Section titled “Guided Procedure”The copy procedure consists of three steps:
- Select
- Filter
- Copy
Step 1 - Select
Section titled “Step 1 - Select”This step displays a table containing all work phases of the projects/offices you have access to.
To view only the work phases of this project, activate the This Project filter.
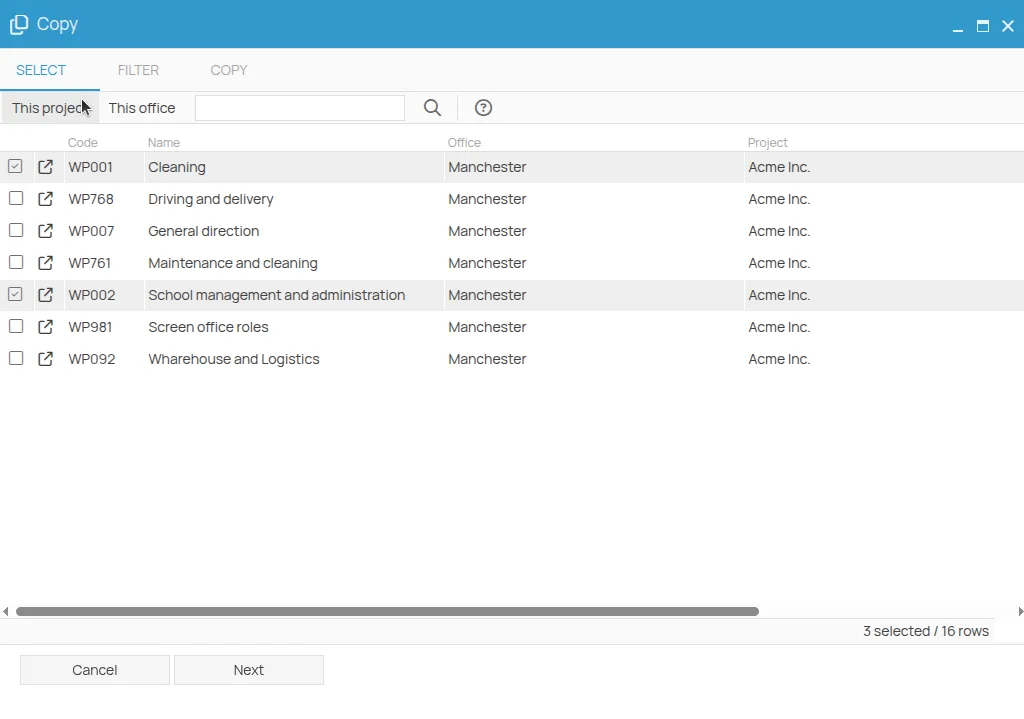
Select the work phases:
- School management and administration
- Cleaning
and click Next.
Step 2 - Filter
Section titled “Step 2 - Filter”This step shows a screen divided into two sections:
- Navigation Tree: list of work phases with their related elements, selected in the previous step.
- Detail View of the element selected in the navigation tree.
From the navigation tree, select and expand the School management and administration work phase.
The New form on the right and the
Expanding the Actions section below, you can see the actions linked to the phase:
- General Training: the icon indicates that this action already exists in the destination office. By default, the system proposes to link the work phase to the existing action.
- Other Actions: the icon indicates that the remaining actions are not present in the destination office and will therefore be created and linked to the work phase.
Now select the elements you want to copy and click Confirm.
Step 3 - Copy
Section titled “Step 3 - Copy”In this step, the copy result will be displayed.