Maintenance
The Maintenance section is located in the Actions area of each project office and is structured on two main levels:
- Plans: define the maintenance needs for material resources and PPE within the office.
- Orders: represent the scheduling of maintenance interventions.
This section also allows you to:
- Record the outcome of a maintenance task and certify its completion.
- Generate a maintenance certificate, which can be saved, edited, exported, or printed in various formats using the “Print” button.
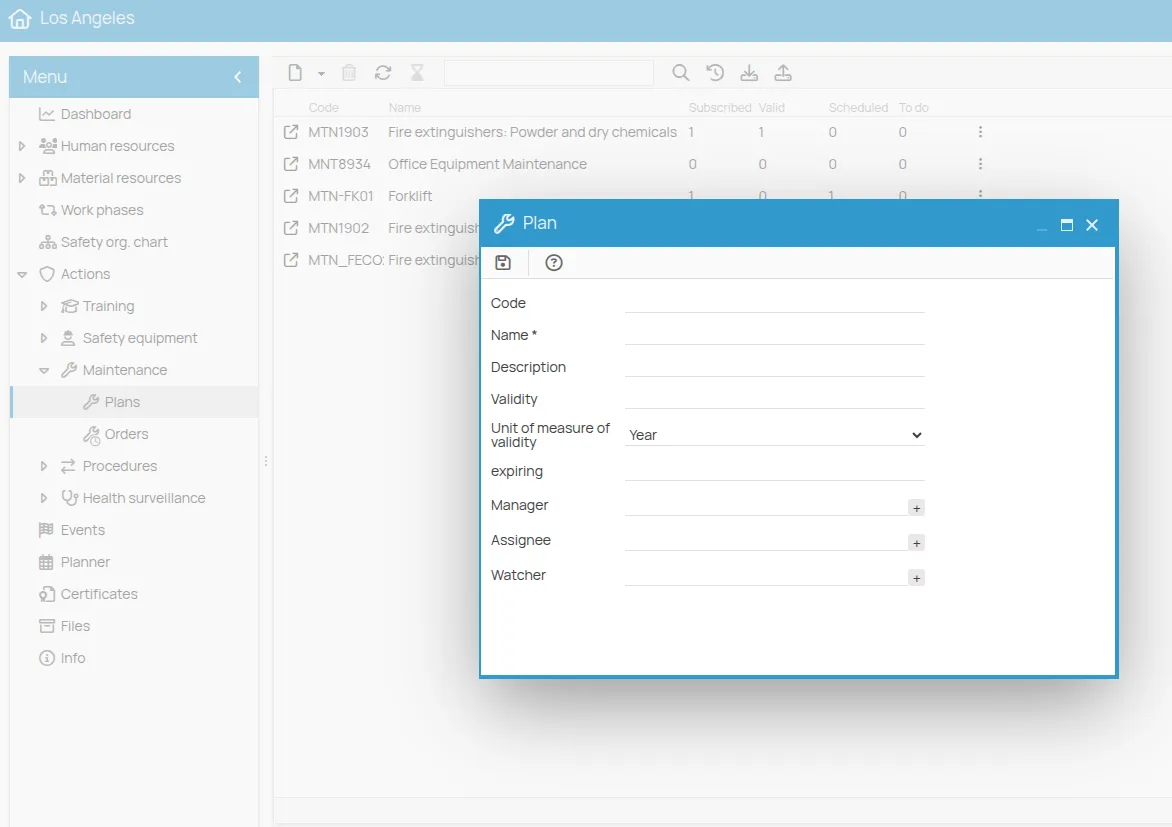
Add a Maintenance Plan
Section titled “Add a Maintenance Plan”- Click New and select New to open the plan creation window.
- The plan may concern a single equipment item (e.g., overhead crane) or a homogeneous group (e.g., elevators). You can later link equipment registered in the Material Resources section.
- Set the validity of the maintenance, i.e., the interval between one order and the next.
- Assign the roles of Manager, Assignee, and Watcher, choosing from people, roles, or users of the office. These roles will be automatically inherited in the planned orders for that plan.
- Save the plan.
After saving, the plan will appear in the list with all indicators set to zero. If you don’t see it immediately, click Refresh in the toolbar.
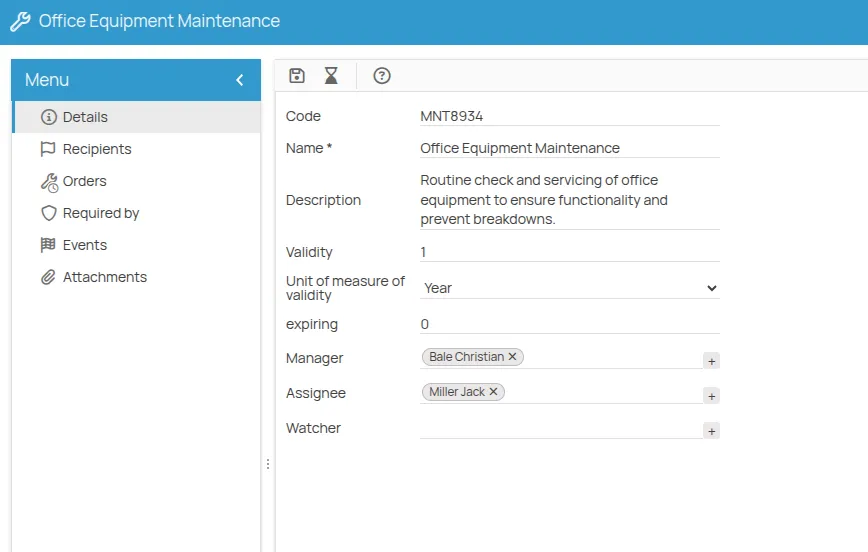
By selecting the plan row, the tabs Details, Recipients, Orders, Required by, Events and Attachments will be activated below, useful for quickly reviewing or editing data.
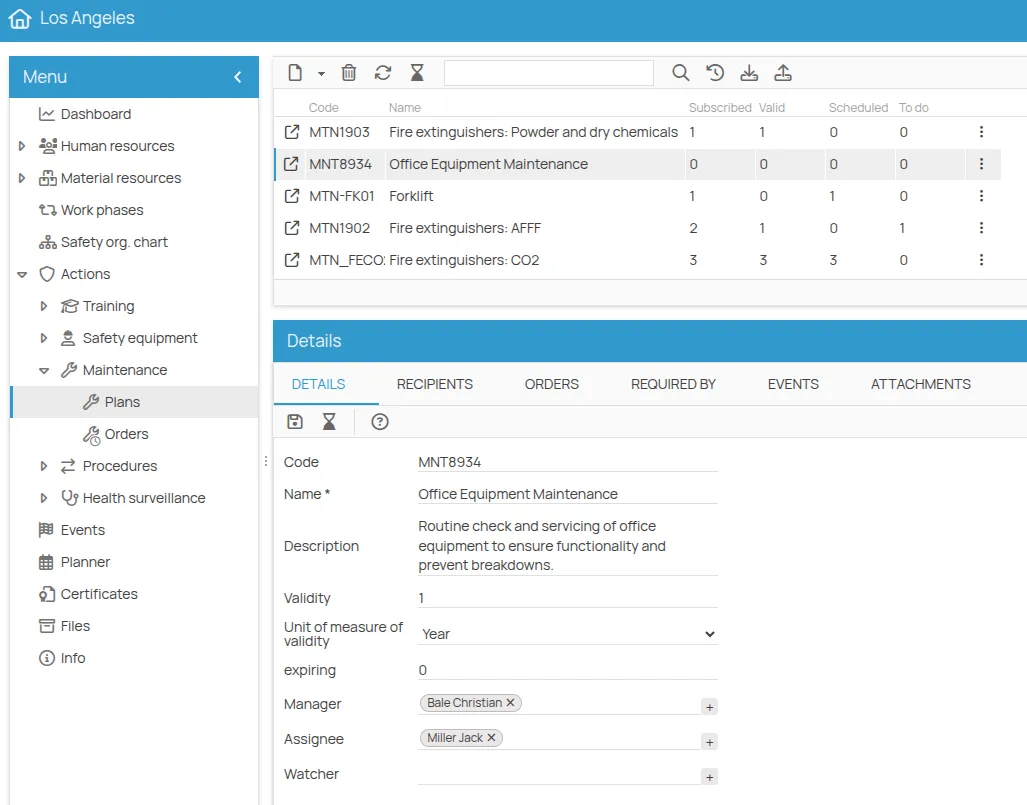
A double click opens the plan sheet, allowing full management of the plan data and its associated orders.
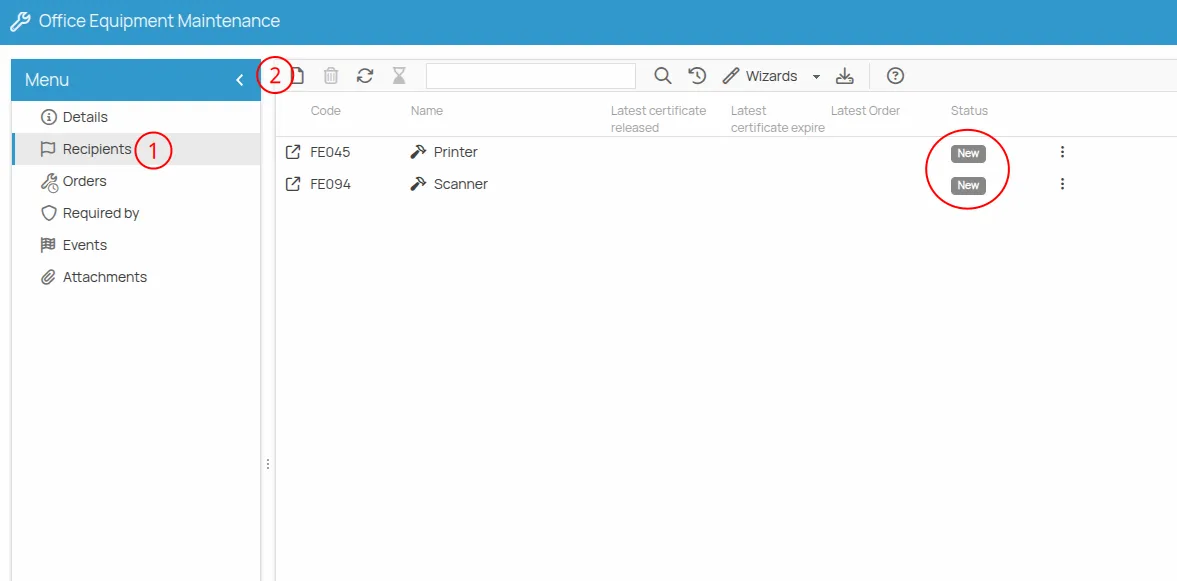
Associate Equipment to be Maintained
Section titled “Associate Equipment to be Maintained”You can associate equipment intended for maintenance as follows:
- Go to the Recipients tab.
- Click New and choose among the available options:
- Equipment
- Work Environments
- PPE
- Offices
Example: by selecting Equipment, you’ll access the list of registered resources.
- Select the equipment to include and press Save. They will be listed as Recipients of the plan, with their corresponding Status:
- New: not yet managed
- Valid / Expired: based on whether a valid or expired maintenance certificate is present
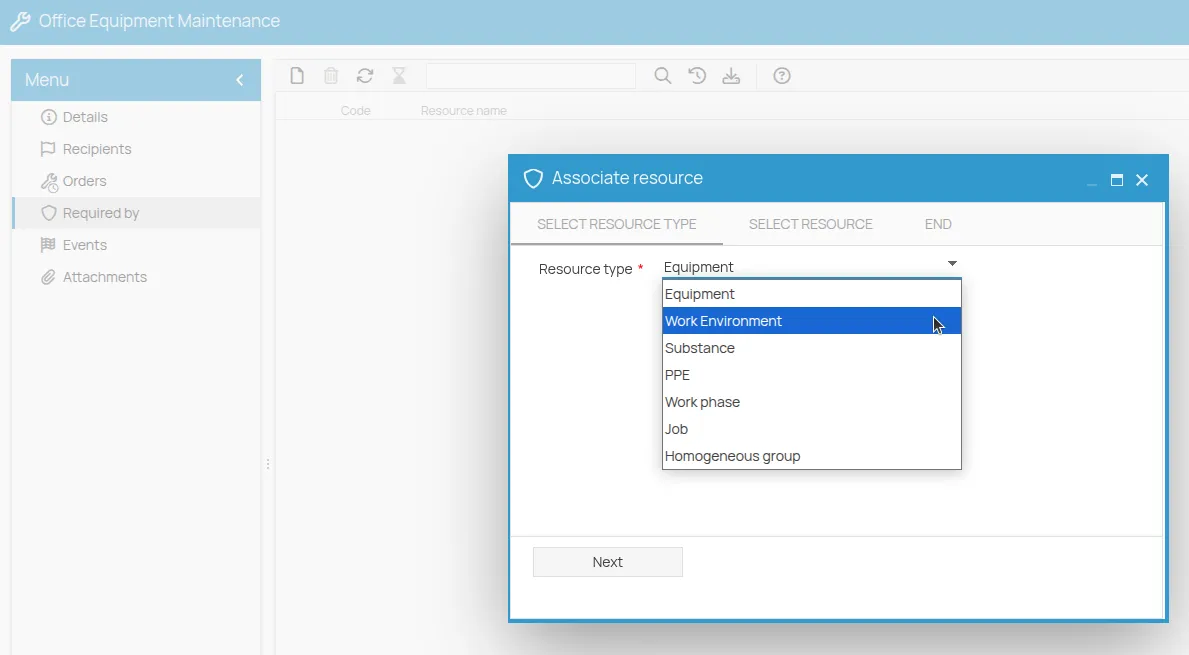
Associate Resources
Section titled “Associate Resources”From the plan’s “Requested by” menu entry, you can specify which company resources require maintenance. This allows you to keep track of the link between maintenance and the specific needs arising from equipment, environments, etc.
- Select the resources to associate from:
- Equipment
- Environment
- Substance
- PPE
- Work Phase
- Task
- Homogeneous Group
- Click Next to select from registered elements
- Select the resources and click Confirm, then Finish
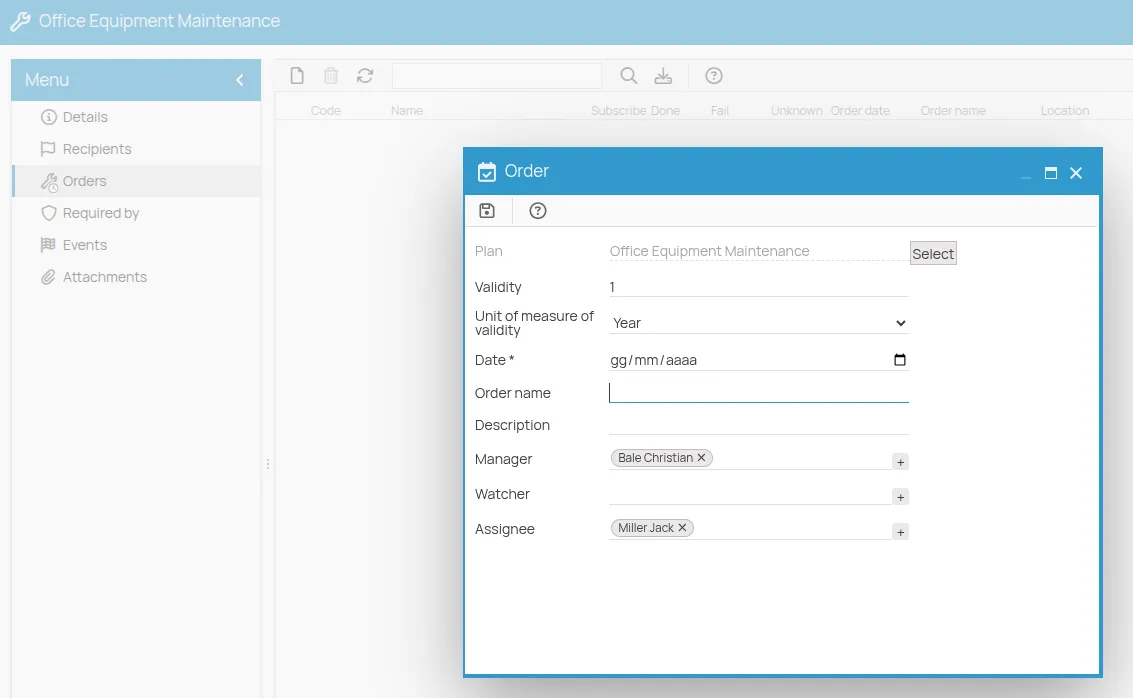
Schedule an Order
Section titled “Schedule an Order”Once the maintenance recipients are associated, you can schedule an order.
- From the Orders menu, click New
- Select the Maintenance Plan using “Select” All available maintenance plans for the office will be shown. If the desired plan is not listed, it needs to be created in the “Plans” section.
- Check the validity of the plan
- The roles of Manager, Assignee, and Observer are inherited, but can be edited for the specific order. If they are users, they will also be recipients of notifications for this task.
- Click Save
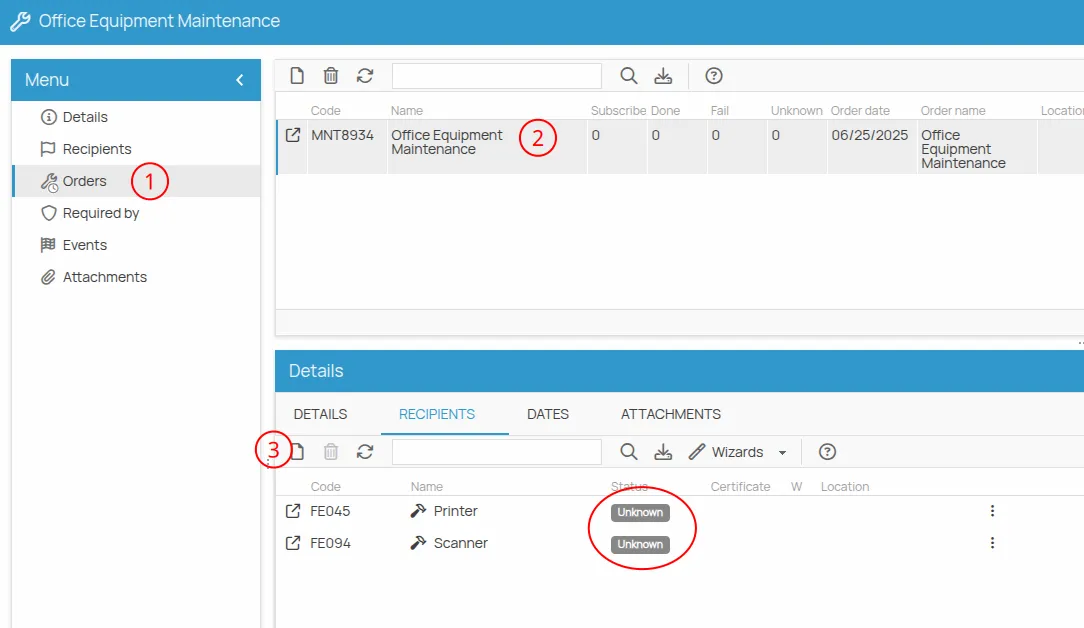
Register Recipients for an Order
Section titled “Register Recipients for an Order”- Select the maintenance order
- Click Recipients, then New. Only resources already linked to the maintenance plan will be available. If no recipients are associated with the plan, no resources will be shown for order enrollment.
- Select the resources to register for the order and click Save
The initial status of the order will be To be filled.
Linked Modules Management
Section titled “Linked Modules Management”The Linked Modules tab allows you to create and manage structured modules associated with maintenance actions. This feature enables the integration of technical checklists or operational reports directly into the maintenance workflow, automatically attaching the generated documentation to the issued certificate.
Through this section, it is possible to define which data templates must be completed during the execution of a maintenance order.
The complete guide for configuring and filling out modules is available in the Linked Modules to Actions section.
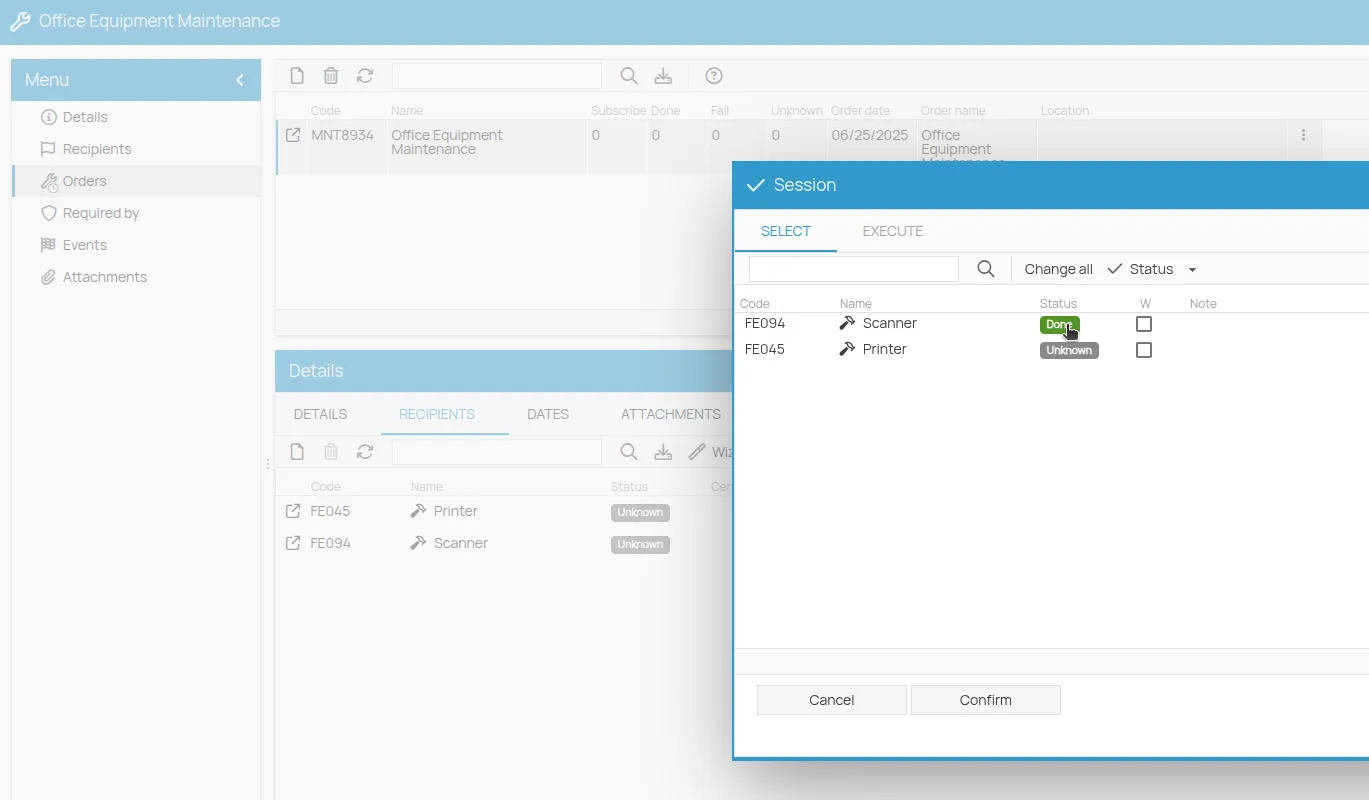
Register the Outcome of a Maintenance Order
Section titled “Register the Outcome of a Maintenance Order”You can record the outcome of an order in two ways: individually or using bulk mode.
Single Mode
Section titled “Single Mode”- Open the order detail by double-clicking the enrollment row.
- Fill in the form by selecting the outcome:
PassedorFailed. - Save.
Bulk Mode
Section titled “Bulk Mode”- From the edition toolbar, click Wizards, then select Bulk Edit.
- The list of resources linked to the order will open.
- Click the status badge to change it.
- (Optional) Check the “W” (warning) box to visually flag a record that needs attention: an icon will appear next to the corresponding row.
- Press Confirm to save all changes.
Generate a Certificate
Section titled “Generate a Certificate”After recording the outcome of the order as “passed”, you can issue certificates:
1. Wizard for Bulk Certificate Creation
Section titled “1. Wizard for Bulk Certificate Creation”- Click Wizards in the toolbar
- Select Bulk Certificate Creation
- A list of enrolled resources will be shown
- Select the resources for which you want to issue certificates
- Click Confirm
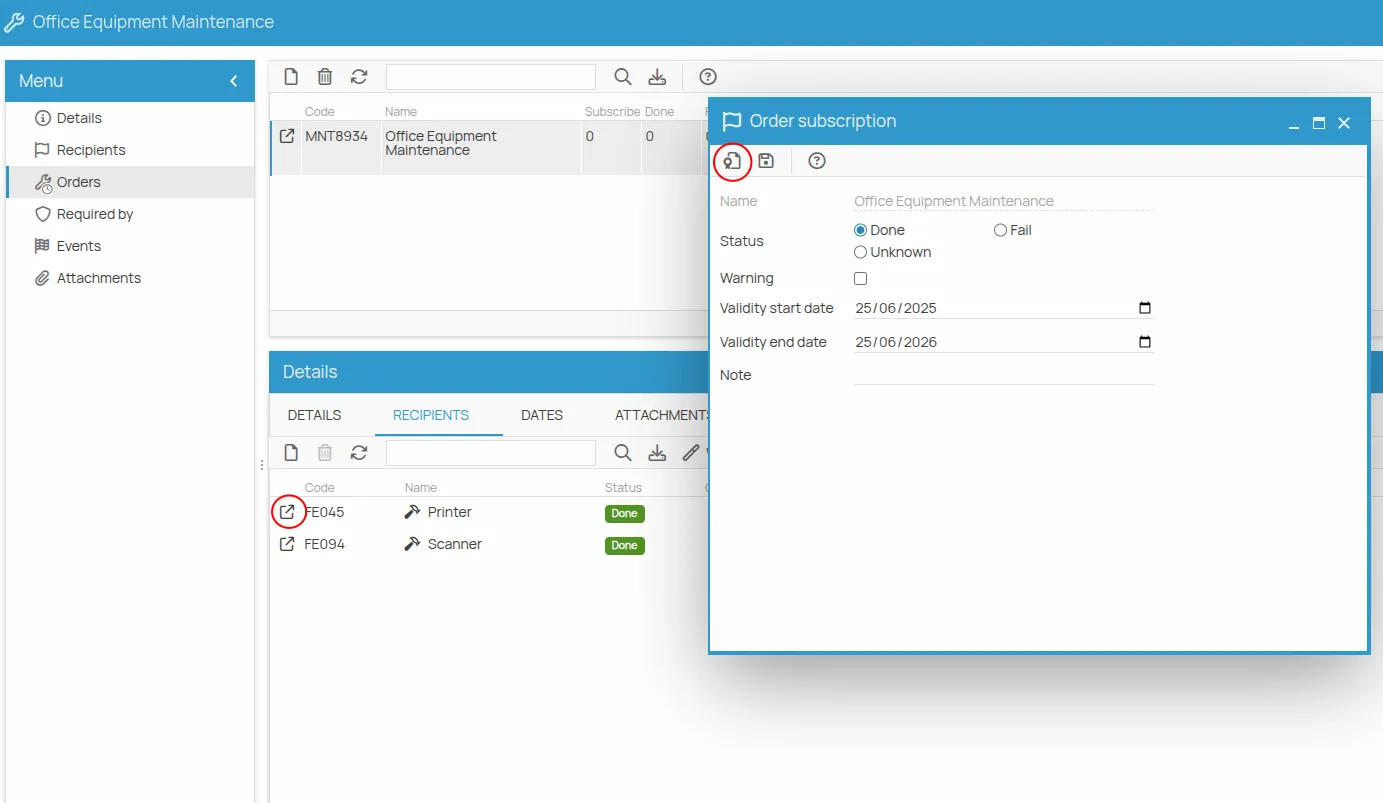
2. Issuance from Enrollment Details
Section titled “2. Issuance from Enrollment Details”- Open the enrollment details (double-click the row or click the icon)
- Check the start and end validity dates
- Click the badge icon, which will automatically issue a certificate for the selected resource.
Once done, the certificate is valid and visible in the expiration schedule.
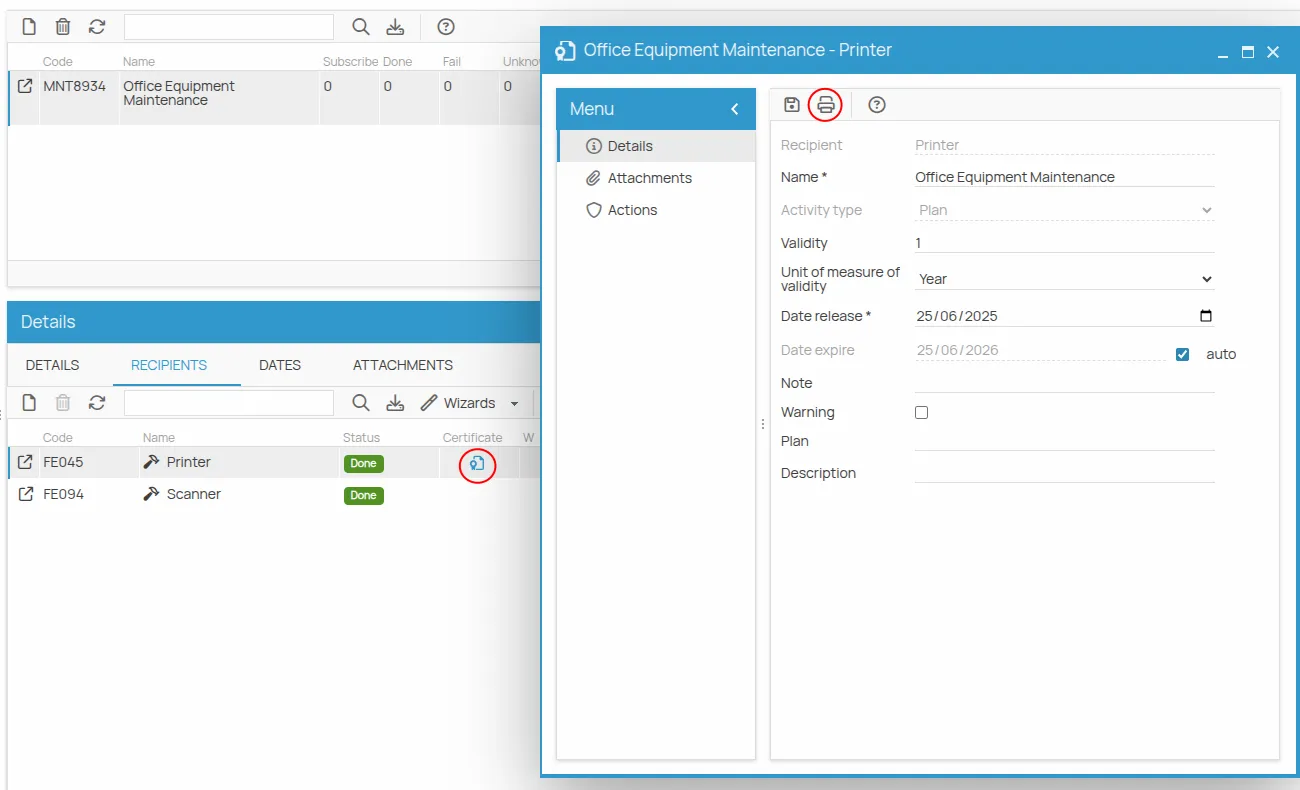
Manage a Certificate
Section titled “Manage a Certificate”In the Certificate column of the “Recipients” tab, the certificate icon is now visible. It gives access to the certificate sheet, where you can:
-
Print
-
Download
-
Attach a document.
-
Click to open the certificate sheet.
-
All information related to the order and the result is shown here, along with optional notes and fields. The editable dates relate to the issue and expiration of the certificate.
-
To export the document, click the Print icon
-
Click ”…” to access the list of available templates.
-
Select the desired template from the list and click Save, then Next to access the document preview.
-
Click the “Print” icon for local printing, or click Next to export or archive it in “Files”.
Attachments
Section titled “Attachments”In “Attachments” you can link files related to the maintenance plan:
-
by adding links to existing files in “Files”
-
by uploading a new file