Procedures
The section dedicated to procedures is located within the Prevention Actions area of each project office.
From Actions, select the Procedures menu, which is structured on two levels:
- Procedures: define the complete set of procedures for the office.
- Reports: define the planning of renewals or reviews of procedures by creating reports.
Within the Procedures section, you can also:
- Register an existing certificate (e.g., to monitor the expiration of an existing procedure or one that you don’t want to schedule).
- Schedule a report.
- Register the result of a report and generate a revision certificate.
- Generate a certificate or upload an external one.
Add a new procedure
Section titled “Add a new procedure”-
Click New at the top left to choose the type of procedure to add. You can either copy an existing procedure or create a new procedure, which can be configured freely through a dedicated interface. In this example, we will add a new environmental assessment procedure for physical or chemical agents.
-
Click Save.

The new row corresponding to the procedure will now appear in the window, with all indicators set to zero. (If no changes are visible, just click Refresh in the toolbar).
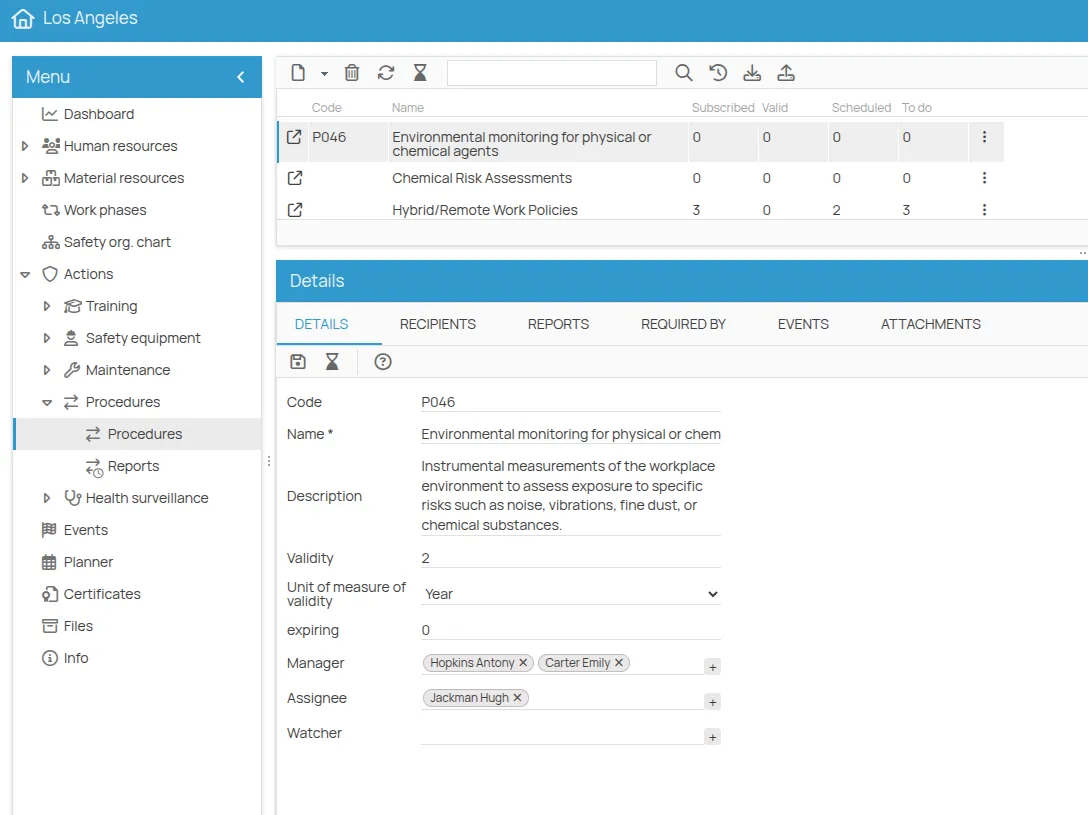
Double-clicking the row or the link icon opens the procedure detail page, where you can view and manage all related information: recipients, reports, and more.
Manage a procedure
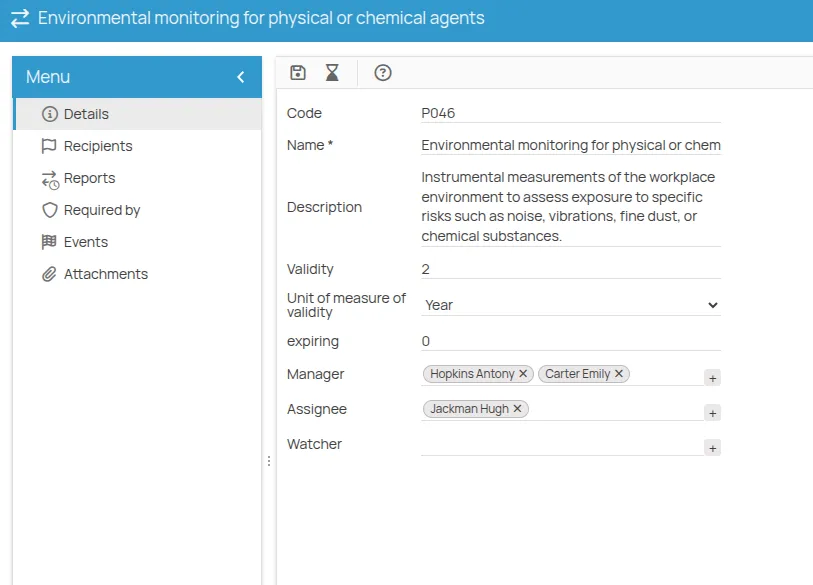
Section titled “Manage a procedure”Procedures can be managed both from the Details tab and the Procedure detail page.
- The Details tab shows key information:
- Name
- Description
- Validity: the interval between one review and the next.
- Expiring: number of days before the expiration when the procedure is marked as “expiring”.
- Assignment of Responsible, Assigned, and Observer roles.
Use the ”+” button to choose between People, Users, and Roles defined in the office’s “Safety Organization Chart”. Multiple users or roles can be assigned to the same task. These assignments are automatically inherited by reports scheduled for this procedure.
- The Recipients tab shows the people and items involved in the procedure.
- The Reports tab lists all revisions of the procedure in reverse chronological order.
- The Requested by tab lists items whose risks are mitigated by the procedure’s validity.
- In the Attachments tab, you can:
- Link an existing file from “Files”
- Upload a new file
Add recipients to a procedure
Section titled “Add recipients to a procedure”Recipients are the resources (workers, environments, equipment, etc.) for which the procedure applies.
For each procedure, in the Recipients section, you must associate either:
- The relevant work phases, or
- The office, if one assessment covers all environments.
This association is required for certified assessment of the procedure.
Recipients can be selected based on:
- Job roles
- Operational areas or departments
- Equipment
- Specific work phases
-
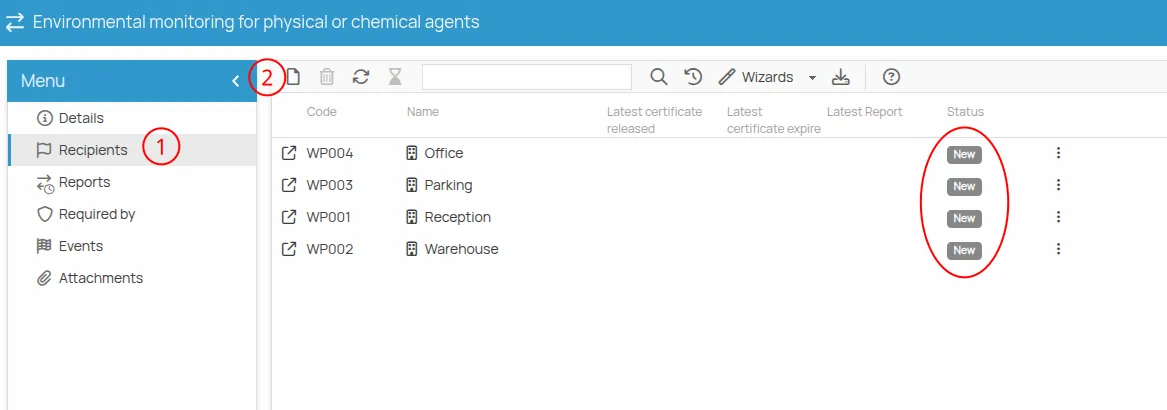
Click Recipients
-
Click New
-
Select the recipient(s) using the available categories (hold Shift for multi-selection), then click Save (e.g., all environments subject to environmental assessments).
-
You can add recipients from multiple categories if needed.
-
All associated recipients will now be visible with their certificate status:
- “New” until managed
- “Valid” or “Expired” depending on the recorded certificate dates
- “Expiring” if near expiration (based on the Expiring field of the course)
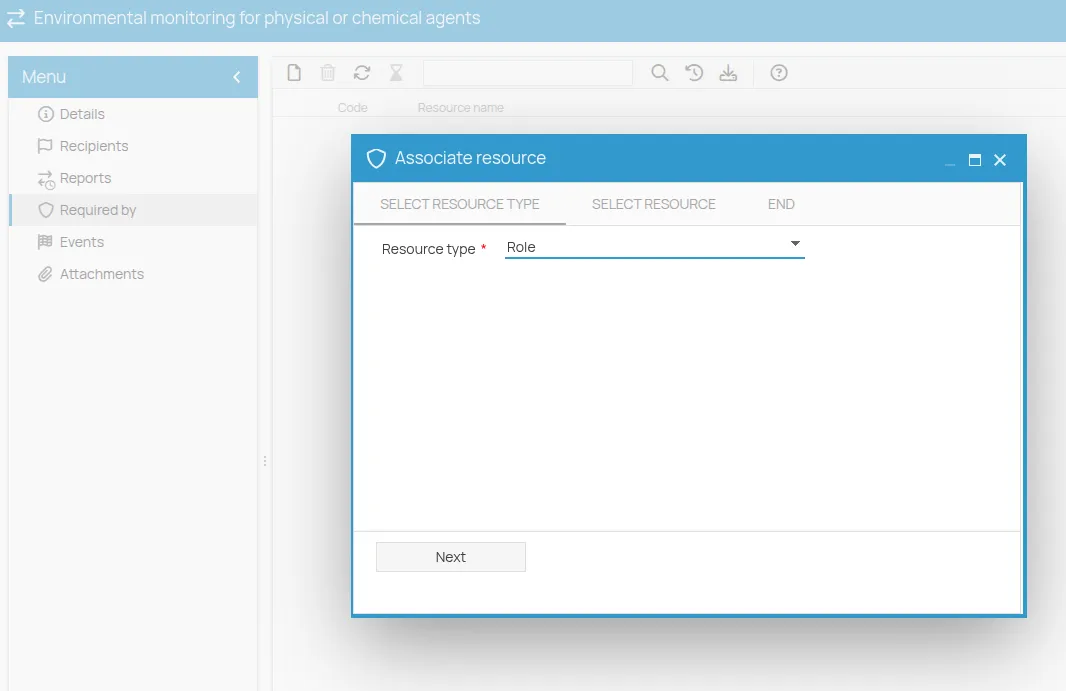
Associate resources
Section titled “Associate resources”From the Requested by menu of a procedure, you can indicate which company resources require the procedure.
- Select resources from:
- Role
- Equipment
- Environment
- Substance
- PPE
- Job role
- Work phase
- Homogeneous group
- Supplier
- Click Next to select from existing items
- Select the resources and click Confirm, then Finish
Schedule a report
Section titled “Schedule a report”Once recipients are linked to a procedure, you can schedule a report.
- From the Reports menu, click New
- Select the Procedure using “Select” (All available procedures for the office will be listed. If not listed, you must create the procedure first.)
- Confirm the procedure validity
- Set the date
- The Responsible, Assigned, and Observer roles are inherited from the procedure but can be edited. If they are users, they will receive notifications for this activity.
- Click Save
Enroll recipients in a report
Section titled “Enroll recipients in a report”- Select the Report
- Click Recipients, then New Only previously assigned procedure recipients will be listed. If none were added to the procedure, no options will be available.
- Select the recipients and click Save
Initial report status will be To be completed.
Linked Modules Management
Section titled “Linked Modules Management”The Linked Modules tab allows you to create and manage structured modules associated with procedures. This feature enables the integration of technical checklists or operational reports directly into the procedure workflow, automatically attaching the generated documentation to the issued report.
Through this section, it is possible to define which data templates must be completed during the execution of a procedure.
The complete guide for configuring and filling out modules is available in the Linked Modules to Procedures section.
Register the result of a report
Section titled “Register the result of a report”Results can be recorded individually or in bulk.
Individual mode
Section titled “Individual mode”- Open the report detail by double-clicking the recipient row
- Select the result:
PassedorFailed - Click Save
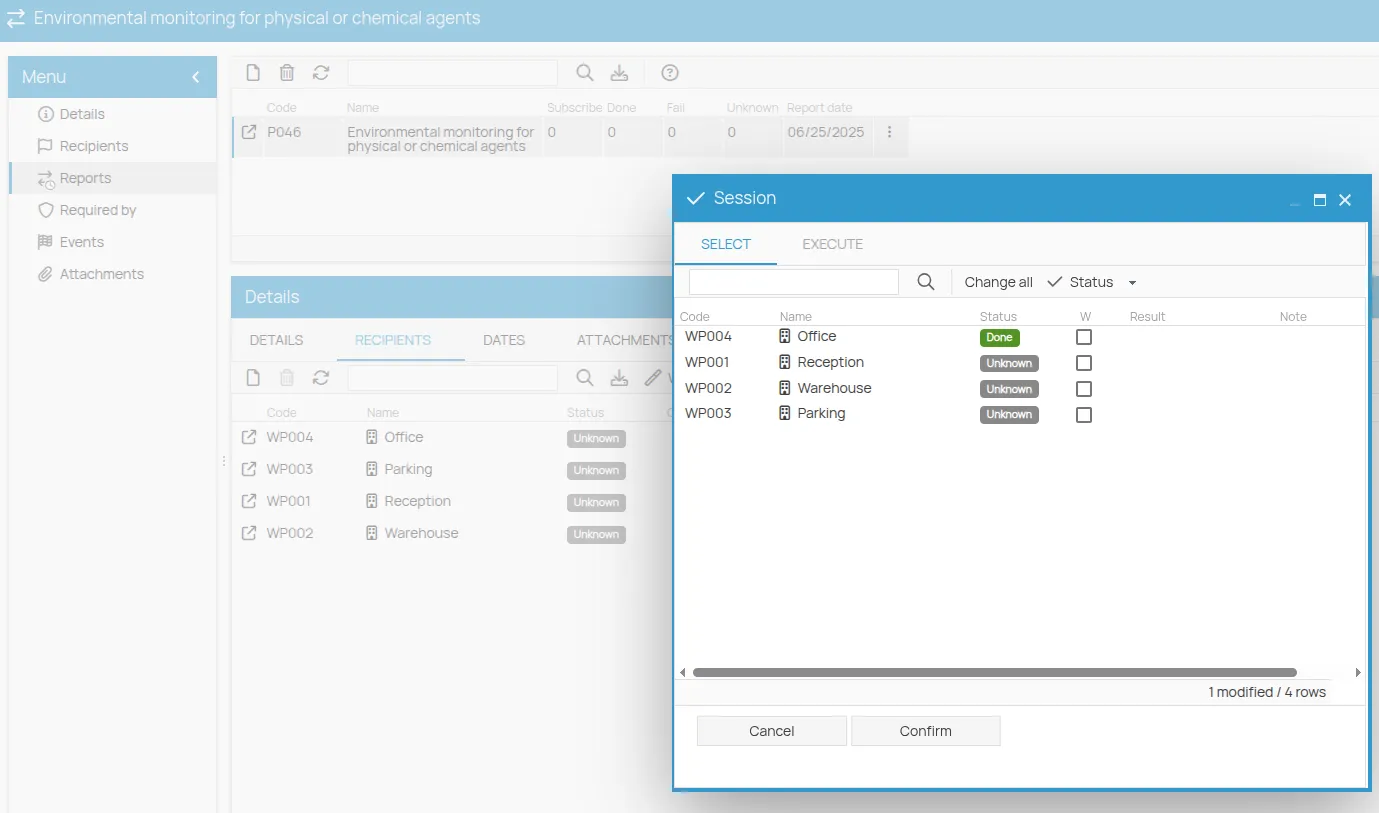
Bulk mode
Section titled “Bulk mode”- From the report toolbar, click Wizards > Bulk edit
- The list of report recipients will appear
- Click the status badge to update it
- (Optional) Check the “W” (warning) box to flag the entry with a visual icon
- Click Confirm to save changes
Generate a certificate
Section titled “Generate a certificate”After registering a Passed result, you can issue the certificates.
1. Bulk creation via wizard
Section titled “1. Bulk creation via wizard”- Click Wizards in the toolbar
- Select Bulk certificate creation
- The list of report recipients will appear
- Select the recipients
- Click Confirm
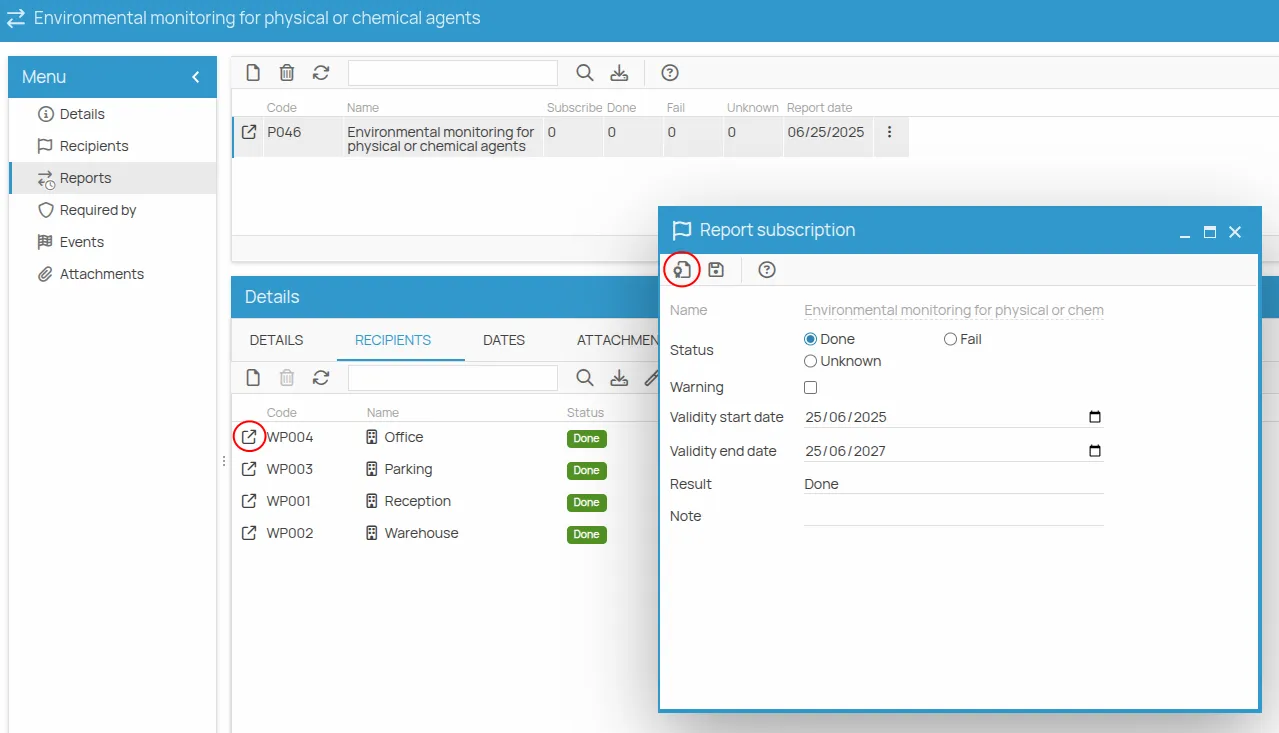
2. From report details
Section titled “2. From report details”- Open the report detail (double-click the row or click the icon)
- Check the start and end validity dates
- Click the ribbon icon to automatically issue a certificate
The certificate will now be valid and visible in the calendar.
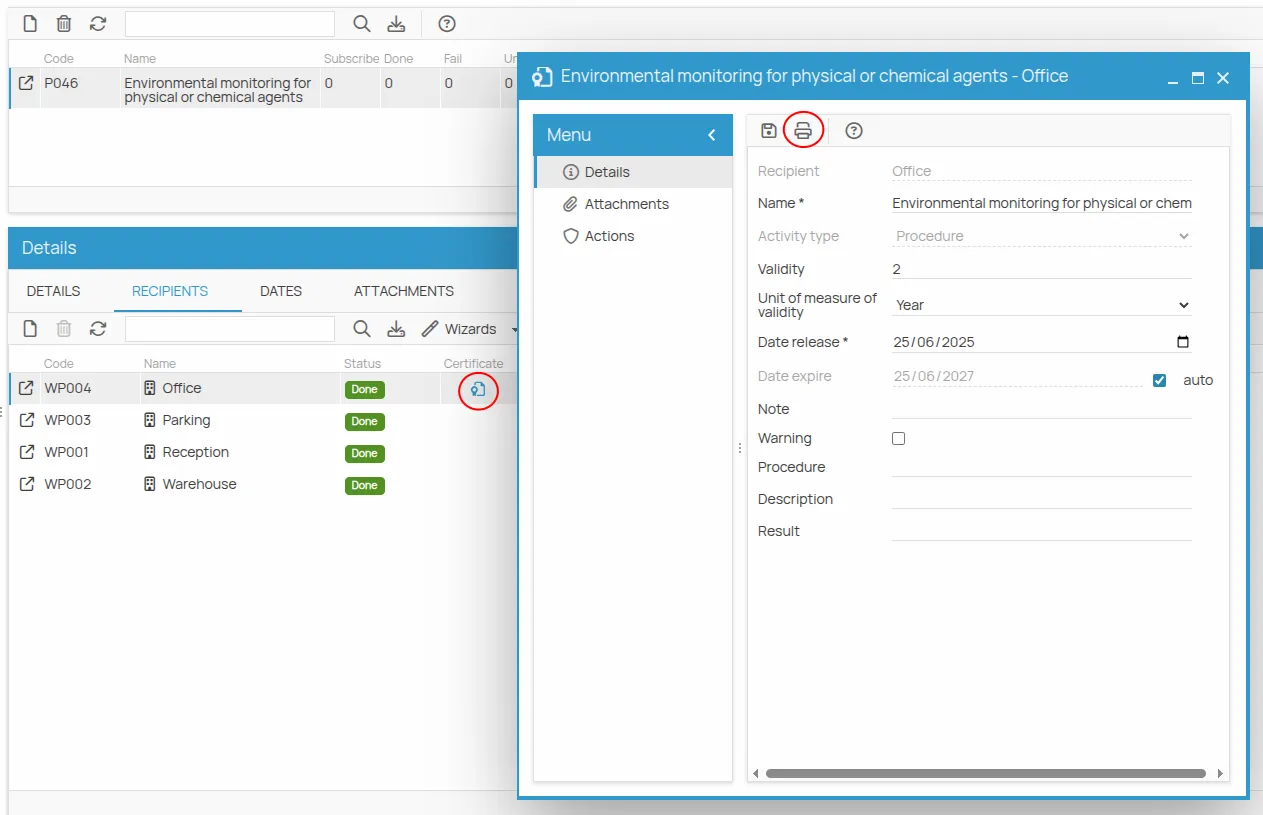
Manage a certificate
Section titled “Manage a certificate”In the Certificate column of the “Recipients” tab, click the icon to open the certificate detail page, where you can:
- Download
- Attach a document
- Click to open the certificate detail page
- It shows all report and result information, including notes and optional fields. Editable dates are for issue and expiration
- To export, click the Print icon
- Click ”…” to browse available templates
- Select the desired template, click Save, then Next to preview
- Use Print to print locally or click Next to export or archive to “Files”
Attachments
Section titled “Attachments”In the Attachments tab, you can:
- Add a link to existing files in “Files”
- Upload a new file