Project Permissions
The Core of Management: Project Permissions
Section titled “The Core of Management: Project Permissions”In 4HSE, the project is the heart of your company’s safety management. This is where overall user access is defined, ensuring that everyone has the right responsibilities and visibility. Managing permissions at this level is essential for maintaining order and security across the system.
Permission Groups for the Project
Section titled “Permission Groups for the Project”To simplify management, 4HSE provides four predefined permission groups for each project:
- Admin: Full control, for those who need to manage every aspect of the project.
- Manager: For supervisors who need to actively operate but without the ability to manage advanced permissions and configurations.
- User: For users who need to view data without modifying it.
- NA (No Access): For users who require extremely limited or no access to the project.
Assigning a user to one of these groups impacts not only the project itself but also their permissions on related entities like offices and suppliers, thanks to an inheritance system that saves time and effort.
Permission Overview by Role
Section titled “Permission Overview by Role”The following table provides a clear overview of what each group can do at the project level.
| Group | Project Permissions |
|---|---|
| Admin | Full project management Read and write permissions Role assignment Access to configuration and contract menus |
| Manager | Partial project management Read and write permissions Cannot view the Permissions, User Logs, Contract, and Configuration sections |
| User | Read-only permissions |
| NA | Very limited access, without the ability to manage or view data |
Inheritance: A Cascade of Permissions
Section titled “Inheritance: A Cascade of Permissions”Permissions set at the project level are not isolated—they cascade to related entities. Once a user’s role on a project is defined, there is no need to configure each individual office or supplier.
The following table summarizes how project roles automatically propagate to other entities.
| Project Role | Office Role | Person Role | Supplier Role |
|---|---|---|---|
| Admin | Manager | Manager | Admin |
| Manager | Manager | Manager | Admin |
| User | User | User | User |
| NA | NA | NA | NA |
How to Set Project Permissions
Section titled “How to Set Project Permissions”Assigning permissions at the project level is done via the Permissions menu.
-
Open the Project detail page;
-
Select Administration from the menu, then the Permissions submenu;
-
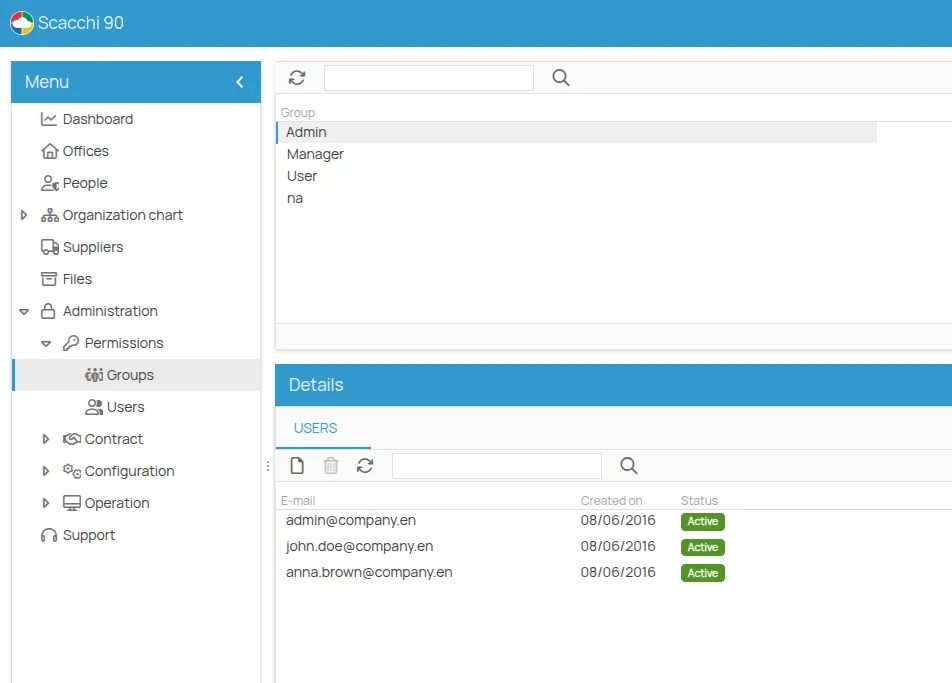
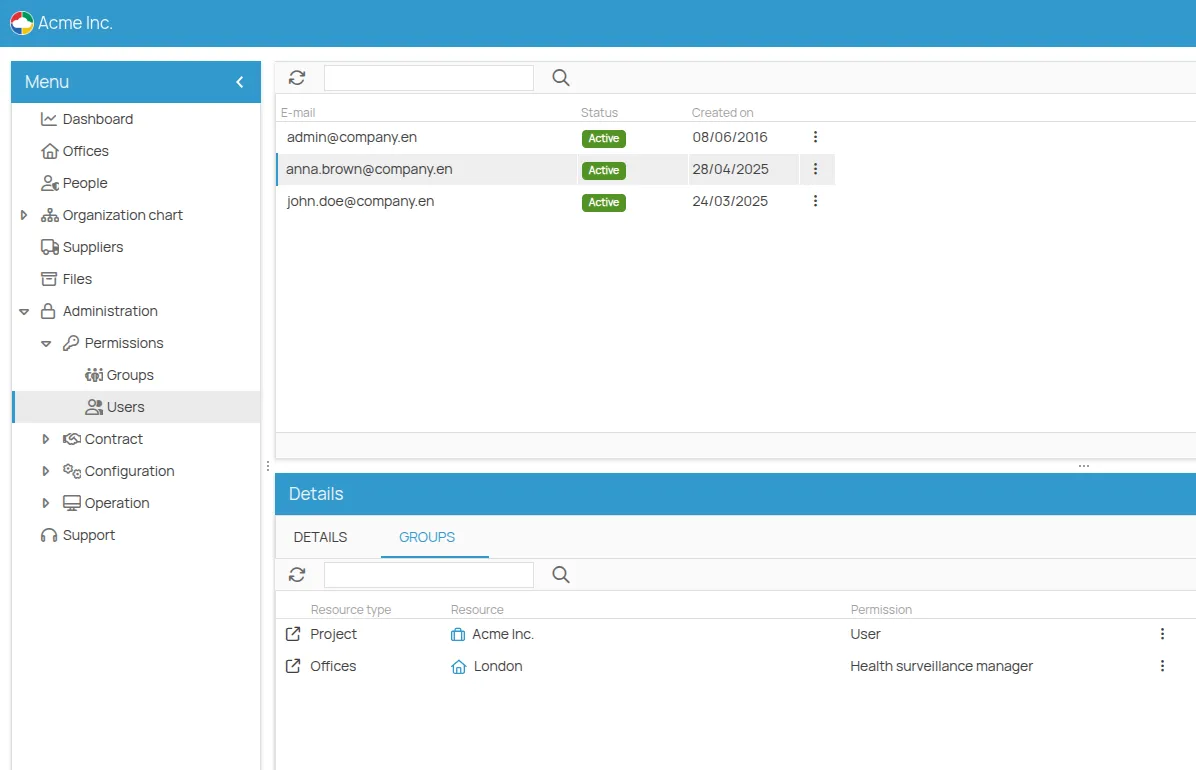
The section has two tabs: Groups and Users;
-
Selecting Groups shows the predefined roles for the project (Admin, Manager, User, NA);
-
In the Details → Users section, you can see the users in each group;
-
To add a user, select New and enter their email address;

-
Selecting Users shows an overview of all users who have direct access to the project.
